Reviews on

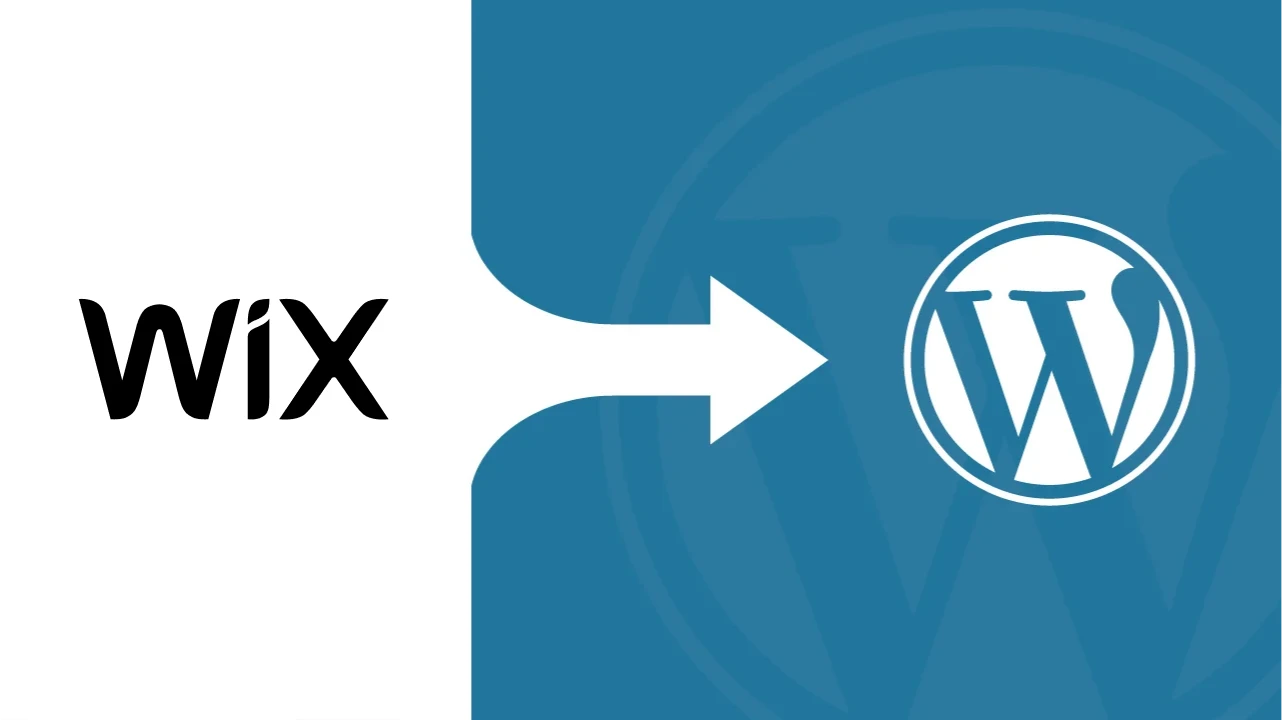
Wix is honestly a great place to start when building a website. It’s easy to use, looks clean, and gets you online quickly.
But at some point, you might hit a wall: limited customization, SEO issues, or maybe you just want more control over how your site works.
And this will happen sooner than expected, especially if you are a growing organization.
Now, that’s where WordPress comes in. It’s open-source, flexible, and built to grow with your needs.
If you’re ready to make the switch, this guide will show you exactly how to migrate your website from Wix to WordPress– clearly, step by step, with no confusing tech words.
- Wix is a popular website builder, but it can feel limiting as your site grows, especially when it comes to design, features, and SEO.
- Migrating to WordPress gives you more freedom and control, starting with setting up a new hosting provider and installing WordPress on your own space.
- You can keep your existing Wix domain or use a new one, just update the DNS settings to point it to your WordPress site.
- Your content (like blog posts) can be moved using RSS, but you’ll need to manually recreate each new page using a WordPress theme or page builder.
- Once everything is set up, your WordPress domain, hosting, and pages, you’ll have a site that’s easier to manage and grow.
Why WordPress and Not Something Else?
First of all, there are plenty of website builders out there, such as Squarespace, Shopify, and Webflow. So why go through the trouble of switching to WordPress?
They are all good options. No doubt, but WordPress gives you more freedom.
- With thousands of templates, plugins, and a lot of customization, you are not using the same layout and design as everyone else.
- With a WordPress website, you can build exactly what you need, whether a personal blog, a growing business site, or something more advanced.
With a Wix website, adding new features usually means paying for a higher plan or dealing with limits. WordPress, on the other hand, doesn’t work like that. You can add tools (called plugins), change how your site looks, and connect things like SEO tools whenever you need to.
Plus, you will have full control over your content, your domain name, and where your site is hosted.
And when it comes to long-term growth, WordPress wins. It’s easier to scale, easier to optimize for search engines, and better suited for managing a professional online presence.
Doesn’t matter if you’re building a new WordPress site from scratch or just planning a migration from Wix to WordPress, you will have a website that will grow with you.
Let the team at cmsMinds handle the heavy lifting. We’ve helped tons of Wix users move to WordPress without the stress.
What to Prepare Before Migrating from Wix to WordPress
Before you directly jump into the moving process of WordPress migration, there are a few things you need to get started. Nothing related to the technical side, so don’t worry.
Just make sure you have the basics in life.
1. A Web Hosting Account
WordPress needs its own space on the internet. This is where your website will live. To do that, you’ll need to purchase web hosting from a reliable hosting provider.
Some popular options are Pressable, Bluehost, SiteGround, and Hostinger. Choose a web hosting plan that fits your needs.
2. A New WordPress Site
Once you’ve got hosting and a domain name, you’ll need to install WordPress. Most hosting companies let you do this with just one click.
After that, you’ll have easy access to your WordPress admin dashboard, where you’ll build your new site.
3. Access to Your Wix Account
You’ll need to log in to your Wix account to copy content, export your blog posts, and grab the Wix RSS feed. Wix doesn’t allow full exports, so you’ll be moving some things manually.
4. Time to Rebuild Your Pages
Wix pages can’t be moved directly to WordPress. You’ll need to recreate them using a WordPress theme and the built-in editor. It takes a bit of time, but you’ll have more freedom to design things your way.
That’s it! Think of these as prerequisites to move your site from Wix to WordPress.
How to Move Your Wix Site to WordPress (Expert Guide)
Now that everything’s ready, let’s walk through the Wix to WordPress migration process. We’ll take it one step at a time, so nothing gets missed.
Step 1. Set Up Your WordPress Website
First, purchase a web hosting plan from a reliable hosting provider that supports WordPress (such as Pressable, Bluehost, SiteGround, or Hostinger).
From there, look for the option to install WordPress. As I mentioned earlier, most hosting companies offer a one-click WordPress installation, so it’s quick and easy.
There’s no technical work required.
After the installation is complete, you’ll receive a link to log in to your WordPress admin area (usually yourdomain.com/wp-admin).
This is where you’ll manage your new site—add pages, install plugins, write blog posts, and more.
Next, choose a WordPress theme that fits your brand and business goals. If you’re thinking, “Does it matter? It’s just a theme,” yes, it does matter. Your theme controls the entire look and feel of your website.
You can browse hundreds of free themes directly in the WordPress directory or purchase a premium one.
Usually, premium themes start from as low as $10 or $15 to a few hundred dollars, depending on design and features.
Choose something clean and simple to start with. You can always switch to a different theme later, so don’t worry about making it perfect right now.
Step 2. Export Blog Posts from Wix Using the RSS Feed
Wix doesn’t have a direct export option to move your entire site to WordPress. So, to move your Wix blog posts, there is a simpler way: you can use the Wix site’s RSS feed.
Now, what’s an RSS feed?
Well, an RSS feed is basically a file that contains your blog content, like the titles, text, publish dates, and links to your posts.
It doesn’t include images or page layouts, but it’s still a helpful way to bring your written content of blog posts over to WordPress without copying and pasting everything manually.
Here’s what you can do:
- Log in to your Wix account and go to the section where you manage your blog.
- In your browser’s address bar, try visiting this link (replace it with your actual site address): https://yourwixsite.com/blog-feed.xml
- If that URL works, you’ll see a page full of code, which is your Wix RSS feed. Don’t worry, you don’t need to read it.
- Right-click on the page and choose “Save As…” to download it as a file, or copy the full URL of the feed. This is what you’ll use to import your blog posts into WordPress in the next step.
This file is also called an XML file, and it works as a bridge between your old Wix blog and your new WordPress site.
While it won’t bring over everything (like images or categories), it’s still a useful starting point to move your blog content without losing your writing.
If you can’t access the RSS feed or you’re using a newer version of the Wix blog that doesn’t support it, you might need to go with a manual migration, which means copying each blog post one by one.
Step 3. Import Blog Posts into WordPress
This step is when you can access the RSS feed file.
It’s now time to bring that content from the Wix site into your new WordPress website.
Here’s how you can do it:
- Log in to your WordPress admin dashboard.
- From the left-hand menu, go to Tools > Import.
- This is where WordPress lets you bring in content from other platforms.
- Look for the RSS option in the list. If it’s not installed yet, you’ll see a link to “Install Now.” Click that, and then hit “Run Importer.”
You’ll now see the option to upload your RSS file. Choose the XML file you downloaded from your Wix RSS feed earlier and upload it. - Click “Upload file and import.” WordPress will start processing the content from the file.
Once the import is complete, your blog posts from Wix will show up in your WordPress posts section. All your post titles, content, and publish dates should be there.
However, keep in mind: this process doesn’t move your images.
WordPress doesn’t automatically pull in images from your old Wix blog, so you’ll need to go through your posts and add the images manually into the WordPress media library.
It takes a bit of extra time, but it’s important for keeping your posts looking complete and polished.
At this stage, your written blog content has officially made it to your new site, and that’s a big step forward.
Step 4. Rebuild Your Wix Pages in WordPress
At least with the RSS feed, blog posts on the Wix site can be moved automatically. But that’s not the case with Wix pages.
So this means you’ll have to recreate every page manually on your new WordPress site.
Now, this will take a little time, but the good news is you’ll have more control over the layout and design of your new WordPress website as you rebuild.
Here’s how you can do it:
- Go to your WordPress admin dashboard.
- In the left menu, click Pages > Add New.
- Now, switch between your old Wix website and WordPress. Copy the content (like text, headings, and links) from each Wix page and paste it into your new WordPress page.
You can also add images, buttons, contact forms, and other elements using the WordPress block editor or a page builder plugin like Elementor or Spectra.
Since everything is in process, this is a great time to:
- Fix any outdated or broken content
- Clean up the layout
- Make your pages mobile-friendly
- Add new features using WordPress plugins
If you felt like Wix templates made it hard to change things or didn’t let you customize enough, WordPress gives you a lot more control.
You can change every part of your website just the way you want, without being stuck with preset layouts or sections you can’t move.
Take your sweet little time with this step. Because we are not aiming to copy everything perfectly, but to build pages that work better, look cleaner, and match your site’s goals.
Step 5. Move Your Images and Media Files
When you use the Wix RSS feed to bring over blog posts, the images usually don’t come with them. That’s because the RSS file only includes the text and basic formatting, not your media, which includes images and videos.
So, you’ll need to upload your images manually to your WordPress media library.
Here’s how you can do it:
- In your WordPress admin dashboard, go to Media > Add New.
- Click “Select Files” and upload the images from your computer, the ones you used on your old Wix website.
- If possible, use the same file names as before. This helps keep things organized and can be useful if you want to match image URLs later or use SEO tools.
- As you go through your posts and pages, insert the correct images where they’re missing.
You can also take this opportunity to:
- Compress large image files to help your WordPress site load faster
- Add alt text for SEO and accessibility
- Organize images into folders or categories (using a plugin, if you prefer)
Right now, it might seem like a lot of work, but trust me, uploading your media manually gives you a lot more control over how things look and load.
And once everything is in your WordPress media library, updating or replacing any image or video later will be much easier when compared to a Wix site.
Step 6. Set Up Menus and Customize Your Site
Once you’ve put your pages and blog posts in place, the next thing to do is make your website easier for people to move around and find what they need.
This is the moment when things really start to make sense. Instead of a bunch of separate pages, your WordPress site starts feeling like a real website. Of course, there’s no end to customization.
Start by creating a navigation menu:
- Go to your WordPress dashboard
- Click on Appearance > Menus
- Create a new menu and give it a name (like “Main Menu”)
- Add your pages (like Home, About, Blog, Contact) by selecting them from the list
- Choose where you want the menu to appear (Usually in the header or top of the page)
This menu helps visitors move around your site easily, just like they did on your old Wix site.
Next, make a few important updates:
- Go to Settings > General to update your site title and tagline
- Install an SEO plugin like Yoast or Rank Math to help search engines understand your content
- Set up your custom domain by updating your domain’s DNS settings (your web hosting provider will usually guide you through this) Add Google Analytics so you can track who’s visiting your site and where they’re coming from
You can also explore the WordPress Customizer under Appearance > Customize to adjust your site’s colors, fonts, and layout depending on the WordPress theme you’re using.
This step might not feel like a big thing now, but it plays a huge role in making your site feel polished and ready to go live.
With a proper menu, updated settings, and basic tools installed, your WordPress site is now well on its way and far more flexible than your old Wix website.
Post-Migration SEO Checklist
Okay, so your site is finally on WordPress. You’ve moved the pages, imported your blog posts, rebuilt things one by one, and maybe even uploaded all your images and other media to WordPress manually. Great.
But this is not the end. There’s one last thing you have to do, and trust me, you don’t want to skip this: Your site’s SEO.
Let me give you a backstory. When you move from Wix to WordPress, your content might be the same, but your URLs and site structure probably the same anymore.
So, how will the search engines know what moved where? That’s when your rankings and traffic might get hurt, and you see a slight drop in the numbers.
That is precisely why I’m going to give you a simple SEO checklist to make sure your site stays visible and healthy after the website migration.
1. Set Up Redirects from Old Wix URLs
Wix and WordPress handle URLs differently. A page that was once at yoursite.com/about-us on Wix might now live at yoursite.com/about on the WordPress platform.
If someone clicks on a link to your old Wix page (maybe from Google, social media, or someone’s blog), they will land on a broken page.
What to do to avoid:
- Try to make a list of your main Wix URLs (especially your homepage, about page, services, blog posts, etc.)
- Then, figure out where those same pages are now located on your WordPress site
- Use a free plugin like Redirection to set up what’s called a 301 redirect. That just means you’re telling browsers and search engines, “Hey, this page has moved, go here instead.”
This step takes a bit of time as you have to redirect Wix pages, but it makes a huge difference in keeping your traffic intact.
2. Install an SEO Plugin (Seriously, Just Do It)
Wix takes care of a lot of SEO stuff in the background without telling you.
On the contrary, WordPress puts you in charge. It may sound scary, but it’s actually a good thing once you have the right tools.
So, before you do anything else, install an SEO plugin.
Recommended:
- Yoast SEO — very beginner-friendly
- Rank Math — slightly more advanced but still easy to use
Both will help you:
- Write better titles and meta descriptions (the text that shows up on Google)
- Set which pages should show up in search results
- Automatically generate a sitemap (more on that below)
- And a bunch of other good stuff you don’t need to memorize right now
3. Clean Up Your Permalinks
WordPress lets you choose how your page and blog URLs are structured. For instance, WordPress gives you something like this: yoursite.com/?p=123
Nobody knows (Including search engines) what that page is just by looking at it.
I know, the default settings aren’t great (as you’ll end up with weird numbers in your URLs), so let’s fix that before you go too far.
Do this:
- Go to Settings > Permalinks
- Choose the “Post name” option
- Click Save Changes
Now, instead of yoursite.com/?p=123, you’ll have yoursite.com/my-blog-post, which is much easier for people (and Google) to understand.
4. Submit Your Site to Google Search Console
You don’t need to “tell” Google about your site; it’ll find it eventually. But if you want faster indexing and fewer surprises, it’s smart to give it a little nudge.
Steps:
- Go to Google Search Console and log in with your Google account
- Add your site and verify ownership (your hosting company or SEO plugin can help with this)
- Submit your sitemap, which your SEO plugin will automatically generate for you (usually at yoursite.com/sitemap.xml)
That’s it. This helps Google crawl your new site faster and figure out what’s changed.
5. Check for Broken Links
After migration, it’s pretty common to end up with some links that point to pages that don’t exist anymore. Mostly, it is either because a URL changed or something didn’t transfer quite right.
Fixing broken links:
- Install the Broken Link Checker plugin
- Let it scan your site and flag any links that lead to 404 pages
- Go back and either update those links or set up a redirect
You don’t have to be perfect, but cleaning up the obvious stuff goes a long way.
6. Make Sure Your Key Pages Still Exist (and Look Right)
Sometimes during or after migration, pages get missed or end up looking different. I mean, what looked like on Wix might not look the same on a WordPress website.
So it’s a good idea to go through your most important pages, like your homepage, contact page, about page, service pages, and main blog posts.
Some important questions that you need to ask yourself:
- Does this page still exist at the right URL?
- Does it load properly on mobile?
- Does it have the same info, or better?
- Are the headings, images, and links all working?
You don’t have to stress over every small detail. Having said that, you can use this time to spot anything weird or broken before your visitors or customers do.
7. Double-Check Your Images and Alt Text
Let’s go back to images again. If you uploaded your images manually, take the extra step and add alt text, a short description of what the image shows.
This helps with SEO and makes your site more accessible.
Just go to Media > Library, click on an image, and fill in the “Alt Text” field with something short and clear like “Team photo at company retreat” or “Product photo – handmade ceramic mug.”
8. Keep Your Wix Site Up (for a Bit) or Add a Redirect
Don’t rush to delete your Wix site right away just cause your new WordPress website is ready.
I’m not saying to keep it forever. However, it’s not a bad idea to:
- Leave it up for a few days while you test your new WordPress site
- Add a message or banner that says, “We’ve moved! Visit our new site at yoursite.com”
- Once everything’s working on WordPress, you can take the Wix site down or use a domain redirect (your domain registrar or hosting company can help with this)
What You Can’t Bring Over From Wix
Let me tell you this honestly, not everything makes the trip. Yes, a few elements in Wix simply cannot be transferred or moved to your new WordPress site.
- Wix Apps (like forms, bookings, chat): Use WordPress plugins: WPForms, Amelia, Tawk.to, etc.
- Wix Templates or Page Layouts: Rebuild using a WordPress theme + block editor or page builder
- Form Submissions & Contacts: Manually copy important entries from your Wix dashboard (they don’t auto-migrate)
- Custom Sections or Animations: Recreate similar layouts with more control using blocks or plugins
- Wix Store Data (Products, Orders): Requires manual setup or help with WooCommerce
Don’t worry, you will find alternatives in WordPress. What you need to remember is you’re not cloning your old site. You’re building a better one.
So, it’s naturally going to take some time, and that’s okay.
Want to Try a Demo Migration First?
If you’re not ready to move everything just yet or if you have second thoughts about WordPress, you can try a demo migration first.
What is it?
Well, it is like a test run. You set up a temporary WordPress site and move over a small part of your Wix content (like a couple of pages or blog posts) just to see how everything works.
It’s a fantastic way for Wix users to get familiar with the WordPress dashboard, test out a theme, or experiment with plugins, all without touching your Wix live site yet.
Some hosting providers or WordPress migration services even offer a built-in demo migration option to help you preview what the final result might look like.
Conclusion
If you have followed along step by step, you’ve pretty much moved your entire website from Wix to WordPress. That’s no small thing.
You’ve got a new setup, a proper web hosting account, your own custom domain, and a WordPress website that’s completely yours.
You picked the theme. You rebuilt the pages. You moved your blog posts. You even uploaded the images yourself. It might’ve taken a bit of time (and a bit of patience), but you did it.
There’s a big chance you still might feel your site isn’t perfect yet, and that’s quite common. The complex part is over. Customization has no limits. You can add, edit, or remove things however you want until you get the feeling “This is it.”
Of course, you don’t have to do everything right away. Take a break and come back. One page, one post, one update at a time.
No problem. If you want to test the waters with a demo migration or just get expert advice, we’re here to help.