Building a website is more than just following a checklist. Yes, there are tons of guides that break down the steps, but most leave out the real gold: the practical tips, hidden pitfalls, and small but important details that can make all the difference.
This guide goes beyond the basics. We will walk through each website development stage with straightforward advice, realistic timelines, and helpful insights that don’t always make it into the standard guides. Think of it as a roadmap, complete with rest stops for checking your progress and picking up tips to keep you on the right track.
Whether creating your first site or looking to refresh an existing one, this guide will help you make choices that lead to a website you will be proud of—one that looks good, performs well, and grows with you. We are keeping it simple, practical, and easy to understand, so you can jump right in without wading through complicated terms or unnecessary details.
What Are the Stages of Website Development?
Website development involves a step-by-step process to bring your vision to life, from initial planning to ongoing maintenance. Each stage is crucial to creating a website that’s user-friendly, functional, and aligned with your business goals.
1. Discovery & Research: Laying the Foundation
This initial stage is all about understanding who the website is for, what it needs to do, and what technical setup will support those goals.
Audience & Business Goals
- Identify Your Audience: Pinpoint the types of people who will visit the site. Consider their age, interests, and online habits. Knowing this helps shape the design and content so it resonates with them.
- Define Business Objectives: Clarify the main goals for the website. Is it to sell products, generate leads, or provide information? Knowing this will guide the design and content decisions.
- Establish Brand Personality: Decide on the tone and personality of the website, whether it’s formal, friendly, modern, or traditional, to ensure it reflects the brand consistently.
Competitor Analysis
- Review Competitors’ Websites: Look at websites from competitors to understand what’s working well and where there’s room to improve.
- Identify Areas to Stand Out: Note any missing features or weak areas on competitors’ sites where your website could be better, such as faster loading times, clearer information, or simpler navigation.
- Assess CMS Needs: Observe what CMS features competitors use and identify any that could benefit your site, such as ease of updating content, mobile-friendly designs, or specific integrations.
Technical Requirements Gathering
- Choose a CMS Platform: Select a CMS (e.g., WordPress, Drupal) that fits the project needs and budget. Some are more flexible, while others are easier to manage.
- Plan for Integrations and Plugins: Identify any specific tools you’ll need, like e-commerce, analytics, or contact forms, and make sure they’re compatible with your CMS.
- Hosting and Security Needs: Choose a reliable hosting provider that can handle your expected traffic and plan for essential security measures, like SSL certificates and data protection.
Common Pitfalls
- Assuming Audience Needs without Data: Avoid relying on assumptions. Gather data through surveys or interviews to understand what users want and need from the site.
- Neglecting Technical Details Early On: Skipping over technical requirements can lead to problems later. Make sure the CMS and chosen plugins support all essential site features.
- Overlooking SEO and Mobile-Friendly Design: These should be considered from the start, as they’re essential to attracting and keeping visitors. Ensure the site is easy to navigate on all devices and optimized for search engines.
From Blueprint to Breakthrough – Let’s Turn Your Ideas into a Powerful, Customized Site That Grows with You.
2. Strategy & Planning: Defining Success
In this stage, the goal is to map out a clear, organized plan for building the website. It helps define which features to prioritize, what the site will look like, who’s responsible for what, and how to manage the budget and timeline.
Project Scope & Features List
- Outline Essential Features: Start by listing the key features the website must have at launch—this is often referred to as the Minimum Viable Product (MVP). For example, if it’s an e-commerce website, essential features might include a product catalog, shopping cart, and checkout.
- Plan for Future Features: Identify additional features that aren’t crucial for launch but could be added as the site grows (like advanced search or personalized user accounts). This helps ensure the site is scalable and can evolve over time.
Sitemap & Wireframes
- Create a Sitemap: A sitemap is a visual outline of the website’s structure, showing all main pages and sections. It maps out the user journey, making it easier to see how users will navigate through the site.
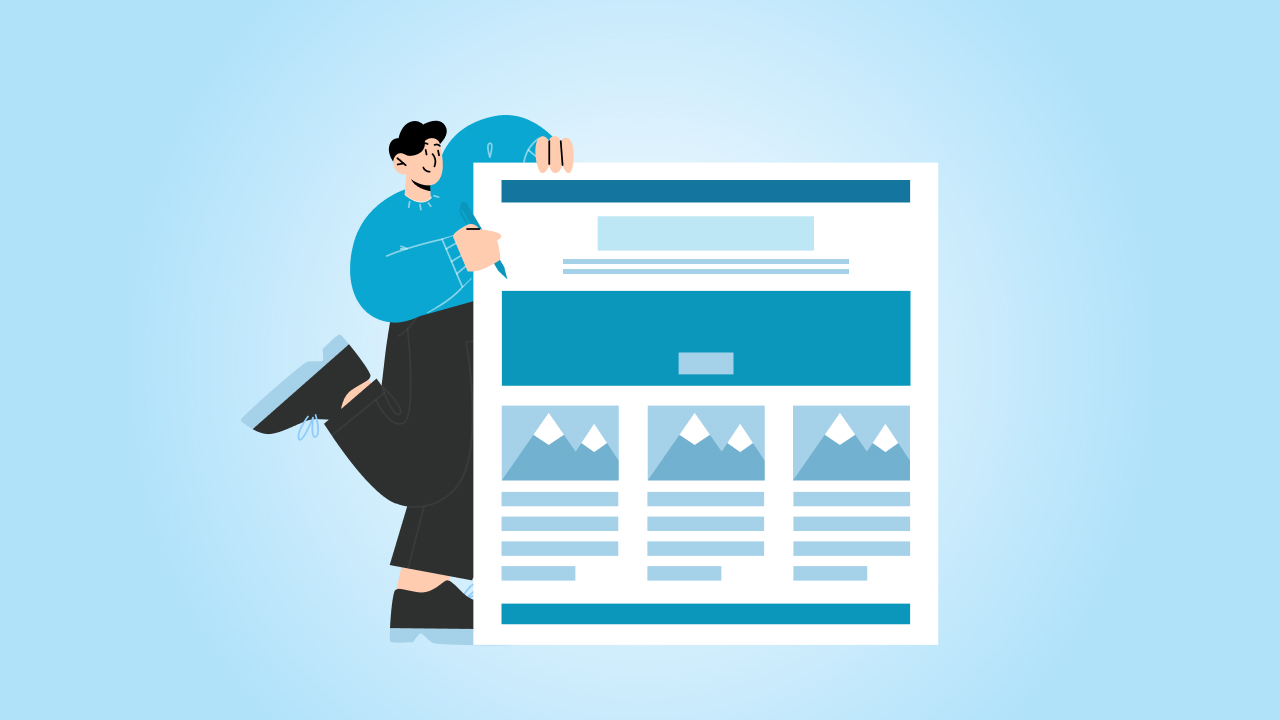
- Build Wireframes: Wireframes are simple layouts for each page, showing where elements like text, images, and buttons will go. They’re a rough guide to the design, allowing for early feedback and adjustments before moving into detailed design work.
- Use Collaboration Tools: Tools like Figma or Adobe XD can help teams collaborate easily on sitemaps and wireframes, making updates and changes more efficient.
Resource Allocation
- Define Roles and Responsibilities: Assign tasks to specific team members, from content creation to development. This clarity prevents overlap and ensures every part of the project has someone responsible.
- Set Milestones: Break the project into smaller goals or milestones, such as completing the design phase, finishing development, or conducting testing. Each milestone should have a target date, helping keep the project on track.
Budget & Timeline Planning
- Estimate Costs Accurately: Calculate the budget needed for each part of the project, including design, development, content, and testing. Include any ongoing costs, like hosting and maintenance.
- Use Project Management Tools: Tools like Trello or Asana can help track progress and keep the team aligned with timelines.
- Plan for Buffer Time: Projects often run into unexpected delays, so add some buffer time to each phase. This helps avoid overruns and keeps the project moving smoothly.
3. Design & User Experience (UX): Making It Visually Engaging
This stage focuses on creating a visually appealing and user-friendly design that aligns with the brand’s identity and provides a seamless experience across devices.
Visual Strategy
- Define Style Guides: Establish a style guide that includes fonts, colors, button styles, and image guidelines. This ensures visual consistency across the website and aligns with the brand’s identity.
- Maintain Brand Consistency: The design should reflect the brand’s personality—whether it’s bold, playful, professional, or minimalist. Consistent visuals build trust and recognition among users.
- Optimize for Accessibility: Ensure the visual design is accessible for users with disabilities, such as by using high-contrast colors and ensuring text is readable. This expands the site’s usability to a broader audience.
Interactive UX Planning
- Design for All Devices: Plan the design to work well on all screen sizes—desktop, tablet, and mobile. Consider a “mobile-first” approach to ensure that even the smallest screens offer a smooth user experience.
- Map Out User Paths: Identify key user paths, such as browsing products, reading articles, or filling out contact forms. Design pages to support these paths, making navigation clear and intuitive.
- Prioritize Speed and Simplicity: Avoid overwhelming users with too many elements. Focus on quick-loading, easy-to-navigate pages that allow users to complete tasks with minimal friction.
Wireframe Testing
- Gather User Feedback Early: Share wireframes (basic page layouts) with a small group of users or stakeholders to collect feedback. This helps spot usability issues early before moving into detailed design work.
- Iterate Based on Feedback: Update wireframes based on feedback to address any navigation or layout issues, ensuring pages are structured intuitively.
- Test Key Interactions: Focus on elements like navigation, buttons, and forms. Ensure users understand how to interact with the site and can complete tasks without confusion.
Prototyping Tools
- Use Prototyping Tools for Approval: Tools like Figma, Adobe XD, or Sketch allow you to create interactive prototypes. This lets stakeholders experience the site flow and layout, giving a realistic preview before development begins.
- Get Stakeholder Buy-In Early: Prototypes help stakeholders visualize the design and provide feedback, reducing miscommunication and ensuring everyone is aligned on the visual and functional aspects.
- Save Time on Revisions: Prototypes enable faster feedback loops, so any design issues can be addressed early. This reduces the need for costly changes later in the project.
4. Content Creation & SEO Optimization: Crafting the Message
This stage focuses on developing valuable, engaging content that attracts visitors and performs well in search engines. Effective content also needs to be easy to manage and update within the chosen CMS.
Content Strategy
- Define Content Needs by Page: List the key pages on the site (e.g., homepage, about, service pages, blog) and identify specific content needs for each, such as product descriptions, testimonials, or FAQs.
- Prioritize High-Value Pages: Focus first on creating high-quality content for the pages that matter most, like landing pages or service pages, as these drive conversions and showcase the brand’s main offerings.
- Craft a Consistent Tone and Voice: Ensure all content reflects the brand’s tone, whether it’s professional, casual, or innovative, to create a cohesive experience for users.
SEO Best Practices
- Keyword Research: Research keywords relevant to your business and audience to understand what terms users are searching for. Use these keywords naturally in your content to increase search visibility.
- On-Page SEO Essentials: Optimize each page for SEO by including keywords in headings, body text, and image alt tags. Additionally, use SEO-friendly URLs, title tags, and meta descriptions to improve rankings.
- Optimize for Readability and Engagement: Break up content with headings, bullet points, and short paragraphs to make it more readable. Engaging content keeps users on the page longer, which positively impacts SEO.
CMS-Friendly Content Creation
- Adapt Content for Easy Management: Write content in a way that’s easy to update in the CMS. For instance, break up content into sections that are simple to edit or rearrange within the CMS’s layout options.
- Create Modular Content: For sites that may need frequent updates (like blogs or product pages), structure content so it’s easy to update without disrupting the page layout or overall design.
- Use Reusable Blocks: Many CMS platforms allow for reusable content blocks. These can help streamline updates, especially for recurring information like contact details, calls to action, or policy statements.
Content Tips
- Use Templates for Faster Drafting: Create templates for common pages, like blog posts, product pages, or service pages. Templates streamline the drafting process and ensure a consistent structure across the site.
- Leverage AI Tools for Efficiency: AI tools can help generate content outlines, headings, or even drafts. This can be especially helpful for large projects, allowing the team to focus on fine-tuning and polishing.
- Maintain Quality and Uniqueness: While templates and AI can speed up drafting, focus on creating unique, valuable content tailored to your brand and audience. High-quality, authentic content is essential for engaging users and boosting SEO.
5. Development & Integrations: Building the Core
In this stage, the website takes shape as the front-end and back-end development teams work together to bring the design and functionality to life. The development also includes essential integrations, testing, and security measures to ensure a stable and secure website.
Front-End Development
- Responsive Design Principles: Build a responsive site that adapts seamlessly to different screen sizes, from desktop to mobile. This includes flexible layouts, scalable images, and navigation that’s easy to use on all devices.
- CMS Theme Customization: Customize the CMS theme to match the design mockups, ensuring that the theme integrates well with the CMS. Tailor the visual elements, fonts, colors, and layouts to meet the brand’s unique needs.
Back-End Development
- CMS Plugin Development: Create or integrate plugins to add essential features to the site, such as e-commerce functionality, SEO tools, or contact forms. Plugins extend the CMS’s capabilities without the need for custom code.
- Database Management: Ensure the database is optimized for quick data retrieval, as this impacts site speed. Set up efficient data storage and backup processes to protect against data loss.
- API Integrations: Integrate with third-party applications, like CRMs, analytics tools, or payment gateways, through APIs. These integrations streamline data flow and automate processes, enhancing the website’s functionality.
Version Control & Testing Environment
- Version Control Practices: Use version control systems like Git to track changes, making it easier to revert to earlier versions if issues arise. This also supports collaborative development, as multiple developers can work on the codebase simultaneously.
- Staging Environment Setup: Establish a staging environment that mirrors the live site. This environment allows for testing changes and updates without affecting the live site, helping catch issues before launch.
Security Measures
- SSL Certificate: Install an SSL certificate to encrypt data exchanged between users and the site, boosting security and helping with search engine rankings.
- Database Encryption: Encrypt sensitive data stored in the database to protect it from unauthorized access.
- API Security: Secure APIs with authentication methods, such as OAuth, to prevent unauthorized access. Regularly review and update API connections to maintain security.
- Regular Security Updates: Keep the CMS, plugins, and integrations up-to-date with the latest security patches. Outdated software is more vulnerable to cyber threats.
Troubleshooting & Iteration
- Structured Bug Identification: Use a systematic approach to test all aspects of the site in the staging environment, including navigation, forms, plugins, and integrations.
- Bug Tracking Tools: Employ bug-tracking tools like Jira or Trello to document issues and assign them to the right team members. This keeps troubleshooting organized and ensures no issues are overlooked.
- Continuous Iteration and Testing: After fixing bugs, retest the affected areas to confirm that the issue is resolved. This iterative process helps ensure a smooth, stable site before launch.
6. Testing & Quality Assurance (QA): Ensuring Robust Performance
The Testing & QA stage ensures that the website functions correctly performs consistently across platforms, and provides a positive user experience. This step is critical for identifying and resolving any issues before the site goes live.
Functionality Testing
- Test Interactive Elements: Check that all interactive features, such as forms, buttons, links, and menus, work as intended. Ensure each element performs its expected action, like submitting data or directing users to the correct page.
- Validate Data Collection and Processing: For features like contact forms, verify that data is correctly captured, stored, and processed (e.g., email notifications and database entries are working as expected).
- Check Error Handling: Ensure the site has clear error messages and redirects users effectively if an issue arises (e.g., form errors or invalid URLs).
Cross-Browser & Device Compatibility Testing
- Test on Multiple Browsers: Ensure that the site performs well on all major browsers, including Chrome, Firefox, Safari, and Edge. Look out for layout issues, visual inconsistencies, or broken features that may appear on specific browsers.
- Optimize for Various Devices: Test the site on a range of devices, from desktops and tablets to smartphones. Check for layout responsiveness, readable text, and smooth interactions across screen sizes and resolutions.
Load Testing
- Simulate High-Traffic Scenarios: Use load testing tools like Apache JMeter or LoadRunner to simulate large volumes of traffic and measure the site’s response. This helps identify potential bottlenecks that could slow down the site or cause crashes.
- Optimize Performance: Based on load testing results, make adjustments to improve site performance, such as optimizing images, reducing HTTP requests, or implementing caching solutions.
User Testing
- Conduct Real-World UX Testing: Gather a group of users to test the site and observe their interactions. Watch how they navigate the site, locate information, and complete tasks like filling out forms or checking out (if applicable).
- Identify Usability Issues: Collect feedback on ease of use, page loading times, and any confusing elements. Make adjustments based on this feedback to improve the user experience before launch.
Checklist for CMS Testing
- Verify Plugin Performance: Test all plugins used on the site to ensure they’re working properly and don’t conflict with one another. If custom plugins are used, check their stability under different conditions.
- Test Custom Features: Ensure any custom CMS features, such as specific layouts or functionality, work as expected. This is especially important if these features involve complex interactions or data processing.
- Content Management Workflow: Test the ease of updating content, such as adding new blog posts or editing page text, to ensure it’s manageable for content editors. Verify that content changes appear correctly on the live site.
7. Launch & Post-Launch Maintenance: Sustaining Success
The Launch and Post-Launch Maintenance stage ensures a smooth website launch and sets up processes to keep the site secure, up-to-date, and effective over time. This stage includes final pre-launch checks, initial training, and strategies for ongoing monitoring and maintenance.
Pre-Launch Checklist
- Finalize SEO Settings: Double-check SEO elements, including metadata, URLs, and alt tags for images. Verify that all pages are optimized for search engines to improve visibility.
- Backup and Migration: Create a full backup of the website to prevent data loss and set up any required migration steps to move the site to the live server.
- Redirect Setup: Implement redirects for old URLs to prevent broken links and maintain SEO value from previous versions of the site. This is especially important if the website structure has changed.
CMS Training for Content Managers
- Onboarding Guide for Content Updates: Provide content managers and admins with a quick guide on using the CMS, including how to update text, images, and other content.
- Highlight Key CMS Features: Walk them through essential CMS functionalities, like creating new pages, adding blog posts, and managing media files, so they feel confident and efficient.
- Security Best Practices: Train team members on security protocols, such as using strong passwords and recognizing potential security threats, to maintain site security.
Monitor & Analyze
- Analytics Setup: Use tools like Google Analytics or Matomo to track key metrics (e.g., traffic, bounce rate, conversions). Set up dashboards that make it easy to monitor performance.
- A/B Testing: Conduct A/B tests on critical pages (like the homepage, product pages, or contact forms) to see what design or content changes improve user engagement or conversions.
-
Feedback Collection: Use tools like Hotjar or user surveys to gather real-world feedback on the site’s performance and user experience. This feedback is essential for making targeted improvements.
For hybrid or offline experiences, QR codes can also help collect feedback or direct users to surveys, support pages, or app downloads. Tools like The QR Code Generator (TQRCG) let you create trackable codes for brochures, packaging, or in-store displays—making it easier to engage users beyond the screen.
Maintenance & Update Schedule
- Routine Security Updates: Schedule regular updates for the CMS, plugins, and other integrations to keep the site secure and running smoothly.
- Plugin and Feature Checks: Test plugins and custom features periodically to ensure compatibility and functionality, especially after major CMS updates.
- Content Refresh: Establish a plan to update content regularly, such as adding blog posts, updating product information, or refreshing visuals, to keep the site relevant and engaging.
Future-Proofing the CMS
- Create a Scalable Structure: Organize content and features so they can be expanded over time. For example, use flexible layouts and reusable content blocks that make it easy to add new sections or features.
- Build with Future Growth in Mind: Ensure the CMS and hosting can handle potential traffic increases, additional languages, or integrations, so the site can grow along with the business.
- Documentation for Custom Features: Document any custom code, plugins, or processes, making it easy for new developers or admins to understand the site’s structure and make updates.
Tips to Streamline the Website Development Process
Building a website can be complex, but with a few strategic adjustments, you can make the development process smoother and more efficient. Here are some practical tips to streamline each stage:
1. Establish Clear Communication Channels
- Use a Centralized Tool: Platforms like Slack, Trello, or Asana keep everyone in sync and reduce communication delays.
- Schedule Regular Check-ins: Set up short, consistent meetings to keep everyone updated on progress, discuss blockers, and ensure alignment.
2. Create a Well-Defined Project Scope
- Avoid Scope Creep: Define and agree on all core features early. Any changes should go through a structured approval process to prevent delays.
- Prioritize Features: Focus on delivering essential features first (MVP) and save “nice-to-have” additions for later stages or future updates.
3. Use Templates and Style Guides
- Streamline Design Elements: Develop templates for common page types (e.g., blog posts, product pages) and a style guide to ensure consistency and speed up design.
- Reusable Code and Components: Use pre-built code snippets or components for repeated elements (such as buttons or forms) to save development time.
4. Implement Version Control Early
- Track All Changes: Version control (e.g., Git) helps track every change made, making it easy to roll back if needed and facilitating collaboration.
- Utilize Branching for Features: Separate feature branches allow different team members to work simultaneously without affecting the main codebase.
5. Test Frequently in Stages
- Adopt a “Test as You Go” Approach: Regularly test elements (like forms, navigation, or layout) as they’re built, rather than waiting for the end. This catches issues early and reduces rework.
- Use Automated Testing: If possible, implement automated tests for critical functionality to speed up the QA process and ensure consistent performance.
6. Plan for Content Early
- Prepare Content During Development: Don’t wait until the development is done to start working on content. Get content ready in parallel so it’s available when the site is ready.
- Utilize a Content Calendar: Plan out when different pieces of content will be completed, especially for larger projects, to stay organized and on schedule.
7. Document Processes and Changes
- Keep Track of Key Decisions: Document any major decisions or changes in scope, as well as CMS customizations and plugin details. This documentation helps onboard new team members and simplifies future updates.
- Create a Knowledge Base: Develop a simple knowledge base or checklist for tasks like routine updates, security checks, or plugin configurations to speed up maintenance.
Key Takeaways for a Successful Website Development Journey
Website development is not a one-time task; it’s an evolving process that benefits from continuous updates, refinements, and improvements. By keeping flexibility and adaptability in mind, businesses can ensure their websites remain relevant, secure, and effective in a fast-changing digital landscape. Embrace this journey with the mindset that a website is a dynamic asset, ready to grow and adapt alongside your business.
At cmsMinds, we prioritize a client-centric approach at every stage. From tailoring the design to reflect a unique brand identity to customizing CMS features and building scalable solutions, our focus is on creating websites that are both powerful and easy for clients to manage. This commitment to customization and collaboration ensures that each website we build aligns perfectly with our client’s goals and adapts to their evolving needs.
Your Vision, Our Code – Let’s Craft a Website That Reflects Your Brand and Engages Your Audience.


