Reviews on


You want a website. WordPress can help you build one. Simple as that.
Whether it’s a blog, promoting a service, or setting up a store, WordPress gives you all the tools you need. And you don’t need to be a designer or developer to use it.
In this guide, you’ll learn how to use WordPress step by step. From choosing a host to customizing your theme and adding pages, we’ll walk you through everything in plain English.
- WordPress lets you build any kind of website: a blog, business site, or online store, even if you’re a beginner.
- There are two versions: WordPress.com (hosted) and WordPress.org (self-hosted). This guide focuses on the more flexible WordPress.org.
- You’ll need a domain and hosting to get started, then you can install WordPress, pick a theme, and start adding pages and content.
- Plugins help you add features like forms, SEO tools, and backups, while themes control your site’s design and layout.
- To keep your new website running smoothly, update regularly, back it up, and clean up old plugins and content.
WordPress.com vs. WordPress.org: What’s the Difference?
Before you start building your WordPress website, there’s one important thing to understand: there are two main versions of WordPress: WordPress.com and WordPress.org. They might sound the same, but they work differently.
Let me explain how.
WordPress.com
This is the hosted version of WordPress. You create an account, and your site runs on their servers. In other words, WordPress.com offers hosting services automatically included with the website creation process.
You don’t need to find a WordPress host or manage updates; everything’s handled for you. That being said, there are certain limits. You can’t install WordPress plugins freely or fully customize your site’s design unless you’re on a paid plan.
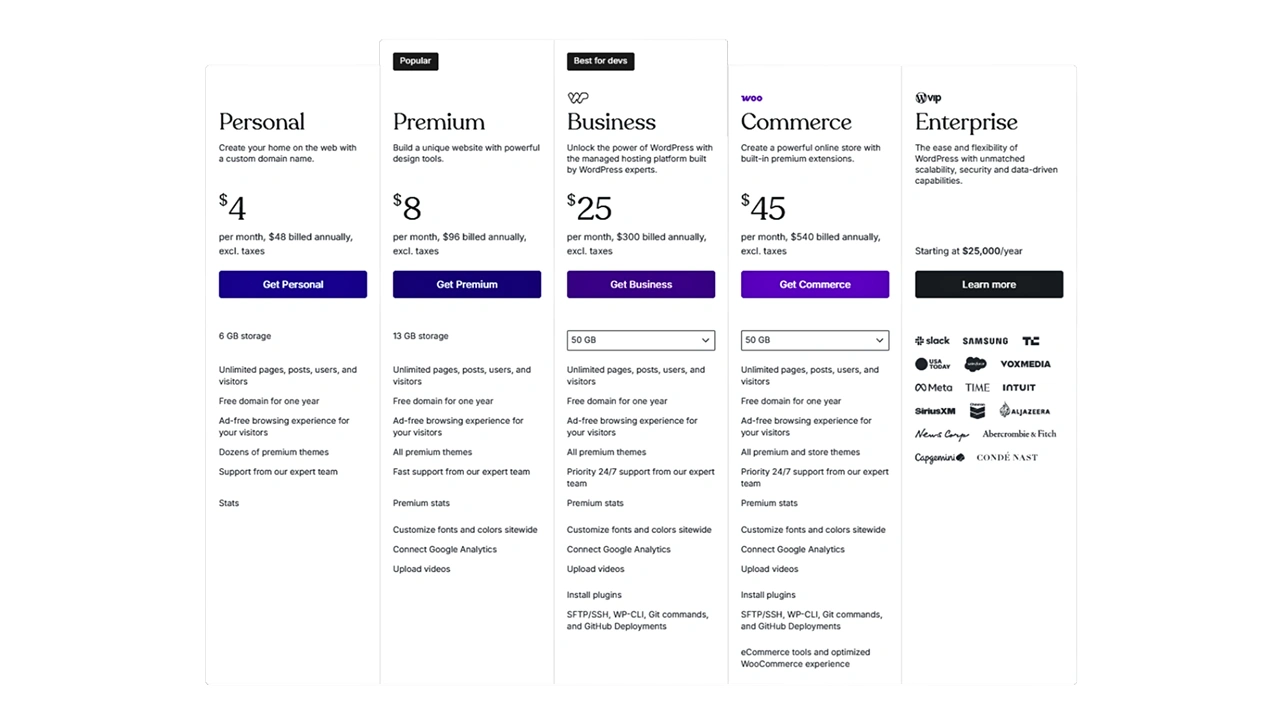
WordPress.com offers five (5) plans: Personal, Premium, Business, Commerce, & Enterprise. You can check their pricing page for more details.
WordPress.org
This is what people usually mean when they talk about using WordPress. WordPress.org allows you to host your own website with a third-party hosting provider.
You’ll have full control over your WordPress site, from picking a WordPress theme to editing CSS, installing plugins, and even doing some advanced customization.
It’s more powerful and gives you access to features like custom templates, block themes, and full site editing, which are all limited or unavailable on WordPress.com. It mostly depends on what plan you choose.
You’ll also find a wide range of free resources, guides, and support from the WordPress.org community to help you get started and grow your site.
WordPress.org is generally more suited for users who prefer a hands-on approach to website management.
So, which one should you use?
If you want the freedom to customize your site, install any plugin, and build anything from a static page to a full online store, go with WordPress.org. That’s the version we’ll be using in this step-by-step guide.
How to Choose a WordPress Host
To get started with WordPress.org, you’ll need two things: a domain name (like yoursite.com) and a WordPress host, that is the company that stores your site’s files and makes it accessible on the web.
There are many web hosts out there that support WordPress, but not all are created equal. The good news is that most of them make it super easy to install WordPress with not more than a few clicks.
What to look for in a good WordPress host:
- One-click WordPress install or pre-installed WordPress
- Fast loading times (especially on mobile devices)
- Reliable customer support
- Free SSL certificate (for site security)
- Automatic updates and backups
- Affordable plans, especially if you’re just getting started
Some well-known options are Pressable, SiteGround, Bluehost, and Hostinger. But feel free to choose one that fits your budget and location.
Once you’ve signed up with a WordPress hosting provider, you’ll either:
- Install WordPress yourself (usually takes 2–5 minutes)
- Or log in and gain access to a dashboard with WordPress already set up for you
Either way, it’s a win-win situation for you.
Getting to Know the WordPress Dashboard
Once you’ve successfully installed WordPress and logged in, you’ll land on the WordPress dashboard. This is your website’s control center. It’s where you’ll create pages, write blog posts, install plugins, change your theme, and manage your entire site.
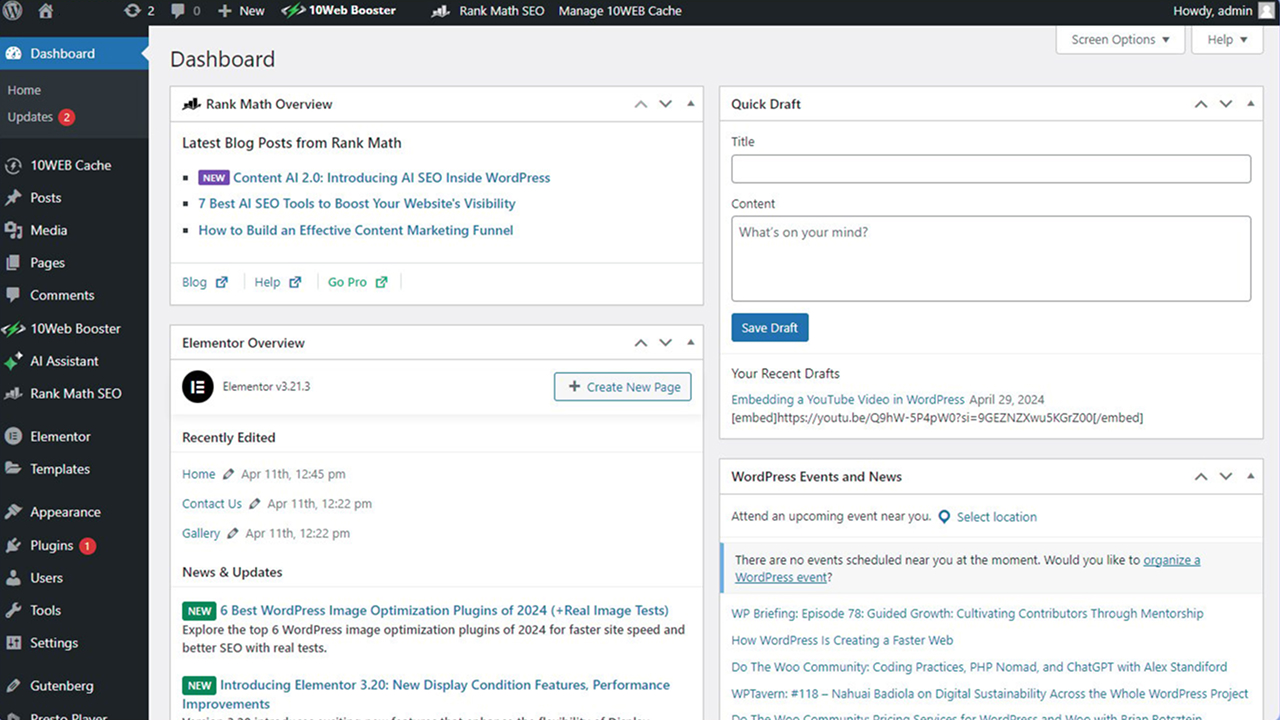
If this is your first time seeing it, it might feel like a lot, but don’t worry. You’ll get the hang of it quickly.
Here’s a quick tour of a few things you’ll see:
- Dashboard (Home): This is your overview. It shows recent activity, quick links, and helpful tips. You can ignore most of this at first.
- Posts: This is where you’ll write blog posts. If you’re running a blog or adding news to your WordPress site, this is where it happens.
- Pages: Use this to create static content like your home page, about page, or contact page. You can add as many pages as you need.
- Appearance: This is where you’ll manage your WordPress theme, custom templates, and the site editor. You’ll also find options to begin customizing your site’s design.
- Plugins: Plugins are tools that add features to your WordPress website. Want to create a contact form, improve SEO, or set up an online store? There’s a plugin for that.
- Settings: Here, you’ll set your site title, tagline, permalink structure, image sizes, and other basics. You’ll visit this area early on.
Other than the above, you’ll also see Media, Comments, Feedback, Case Studies, Events, Portfolios, and a bunch of other things. Take a few minutes and see what’s what.
Don’t worry, you won’t break anything.
Choosing a Theme and Customizing Your Site’s Looks
Your WordPress theme controls how your website looks. Right from layout and colors to fonts and how your pages are displayed, everything depends on the theme you choose.
How to Choose a Theme:
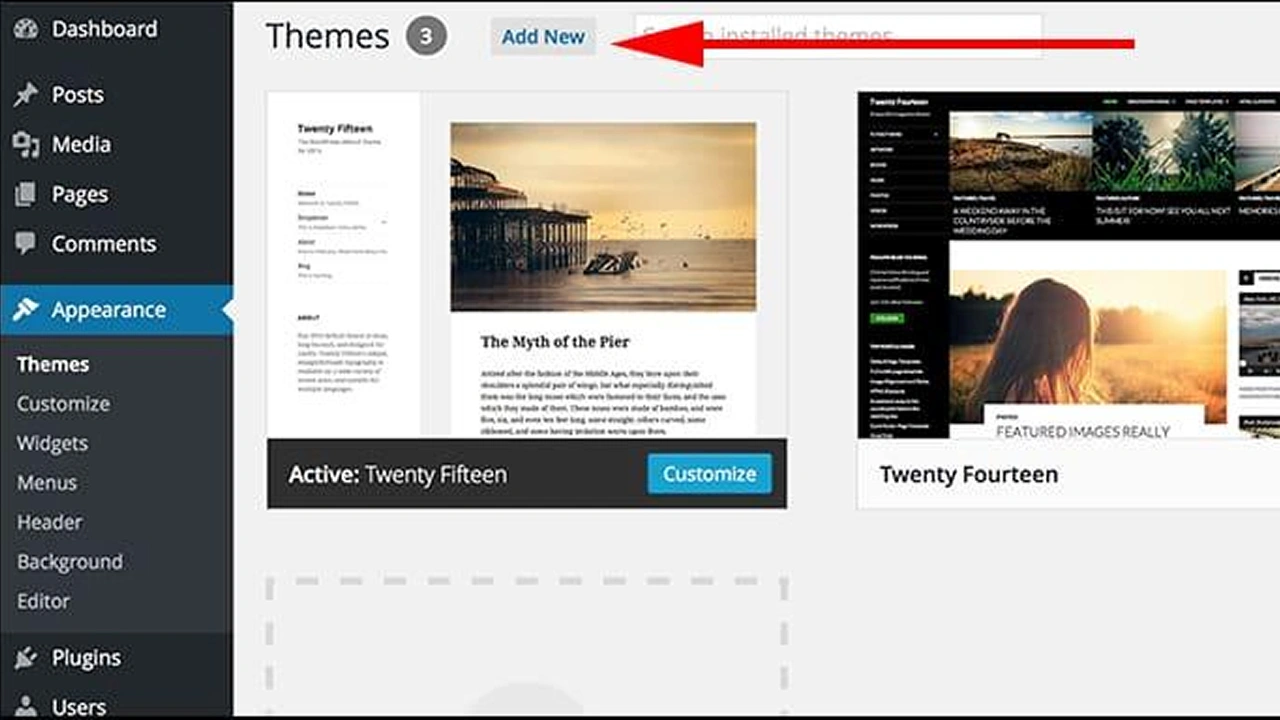
- In your WordPress dashboard, go to Appearance → Themes.
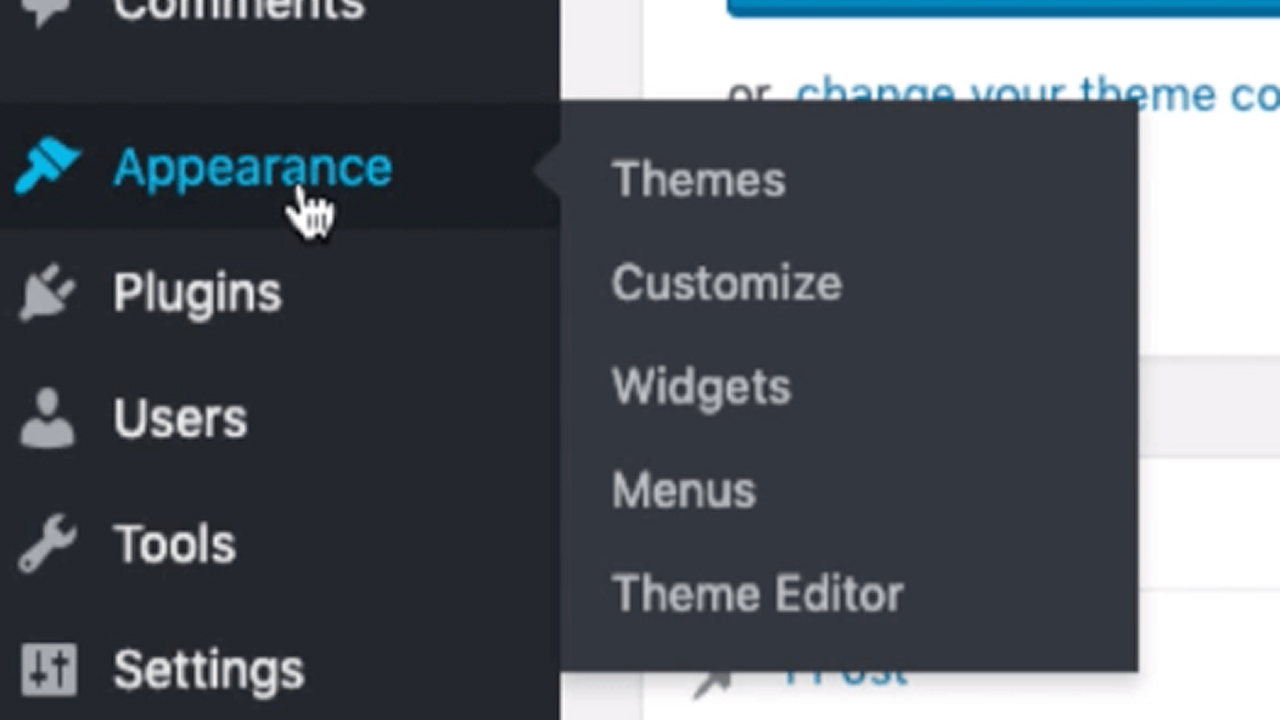
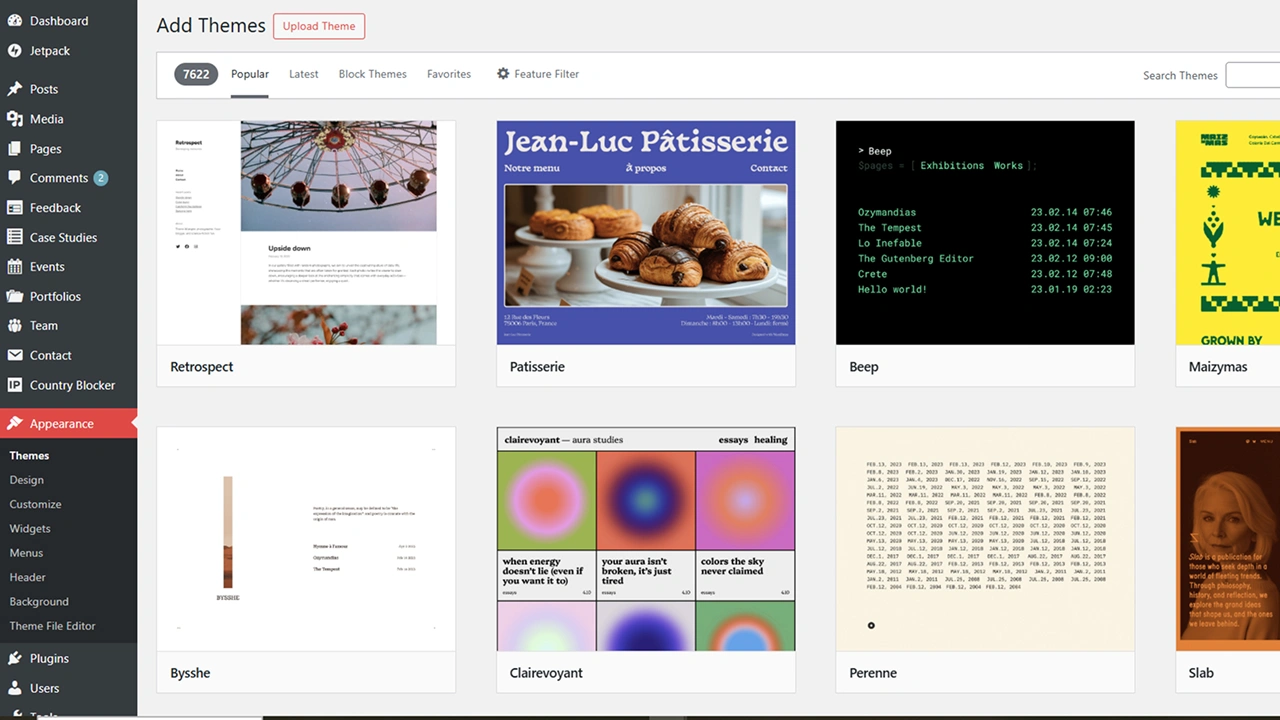
- Click “Add New” to browse thousands of free options.
- Use the search bar or filters to find one that matches your style or industry.
- Click Preview to see how it looks.
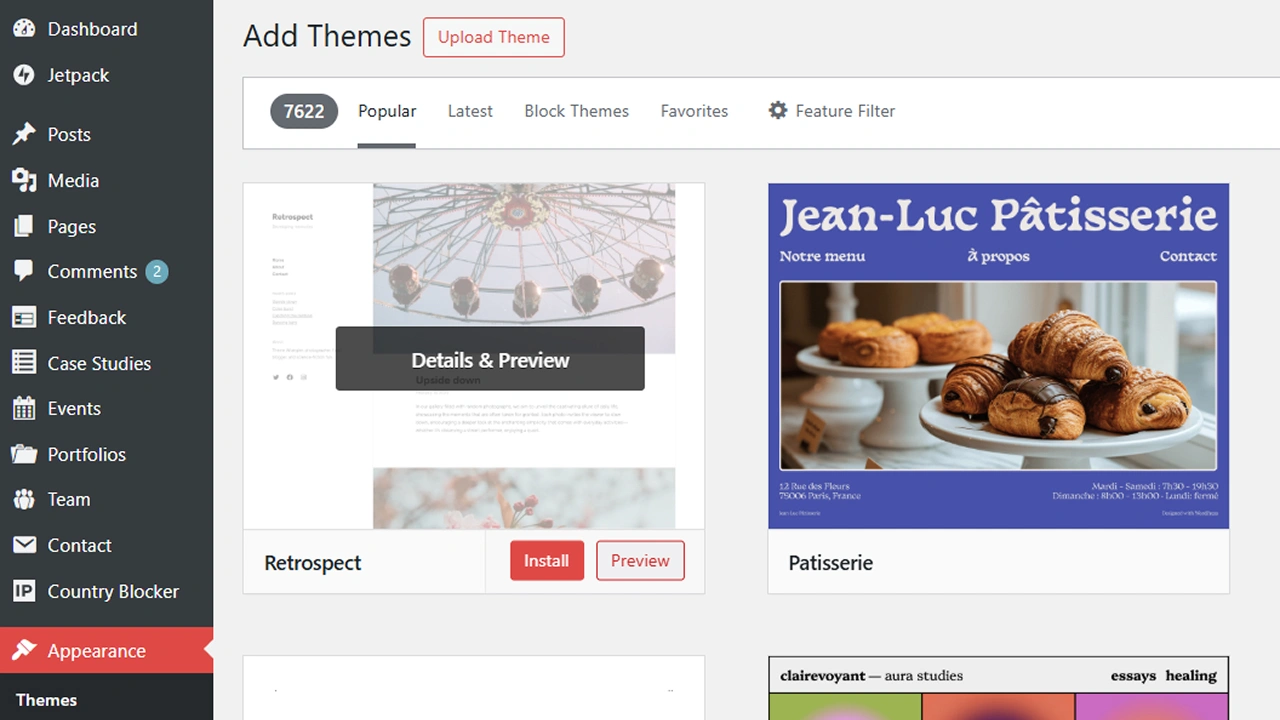
- Click Install, then Activate when you’re ready.
That’s it. A few clicks here and there, and your site’s design changes instantly.
Begin Customizing Your Theme
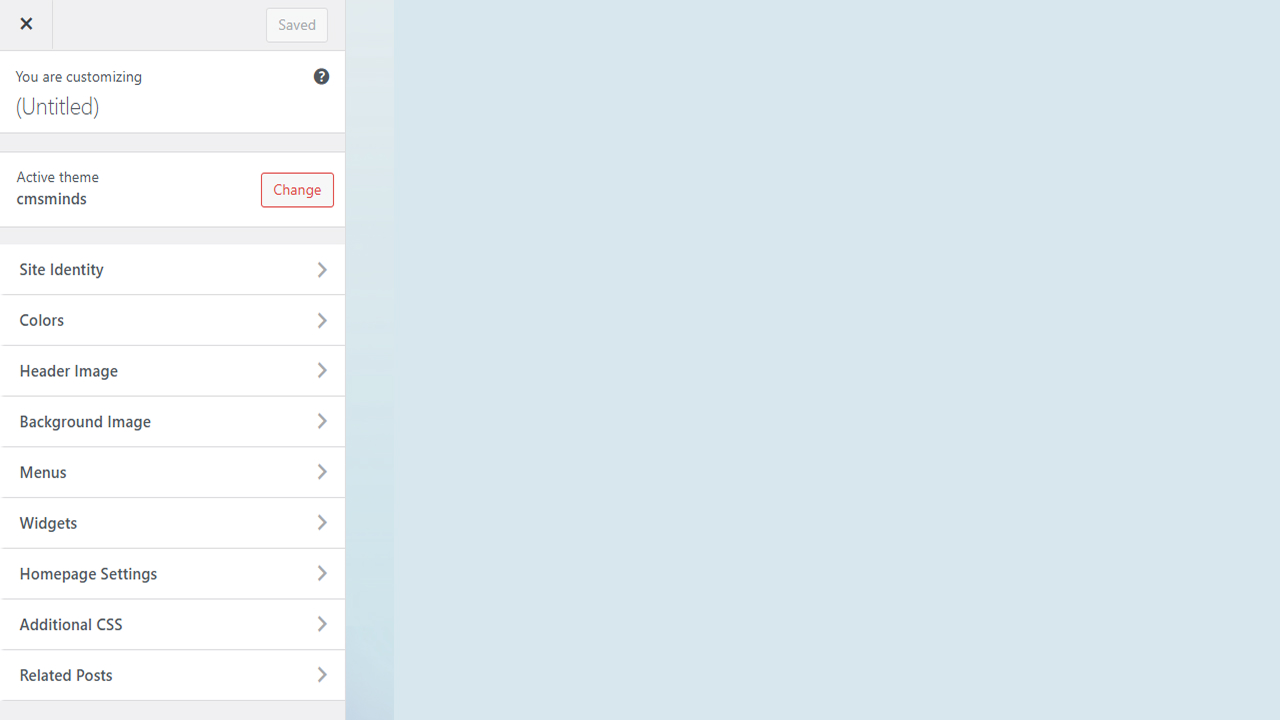
Once your chosen theme is active, go to Appearance → Customize to start editing.

Here, you can update:
- Site title and tagline
- Colors and fonts (or global styles if you’re using a block theme)
- Header, footer, and menu layouts
- Homepage layout or static content
Some themes also support custom templates for things like landing pages or blog archives. Others use the site editor (a newer WordPress feature) to give you more control without touching code.
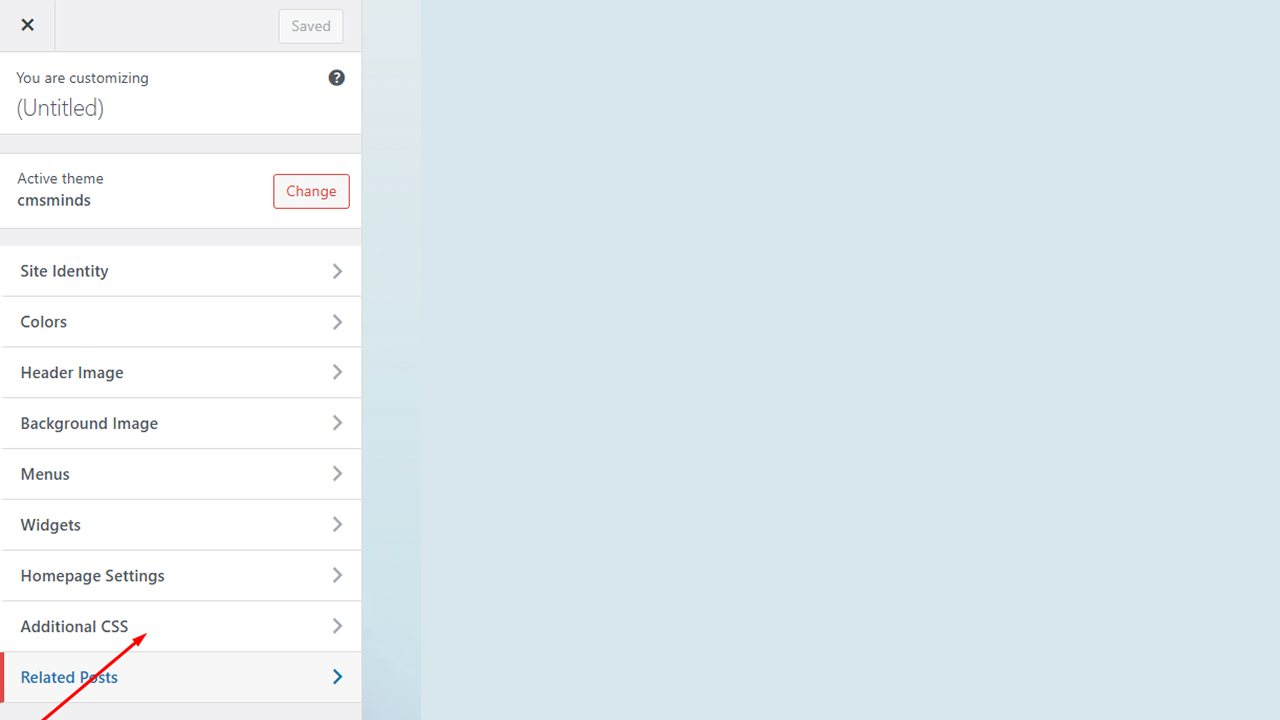
If you’re feeling confident, you can also explore the Additional CSS section for light CSS editing.
Note: You can switch your theme anytime without rebuilding your entire website.
Adding Content: Pages, Posts, and Blocks
Now that your site has a look, it’s time to add some content. This means your pages, blog posts, images, and anything else visitors will see.
WordPress makes this easy with its block editor (sometimes called Gutenberg). You can use blocks to add text, headings, images, videos, buttons, links, and more without ever touching any code.
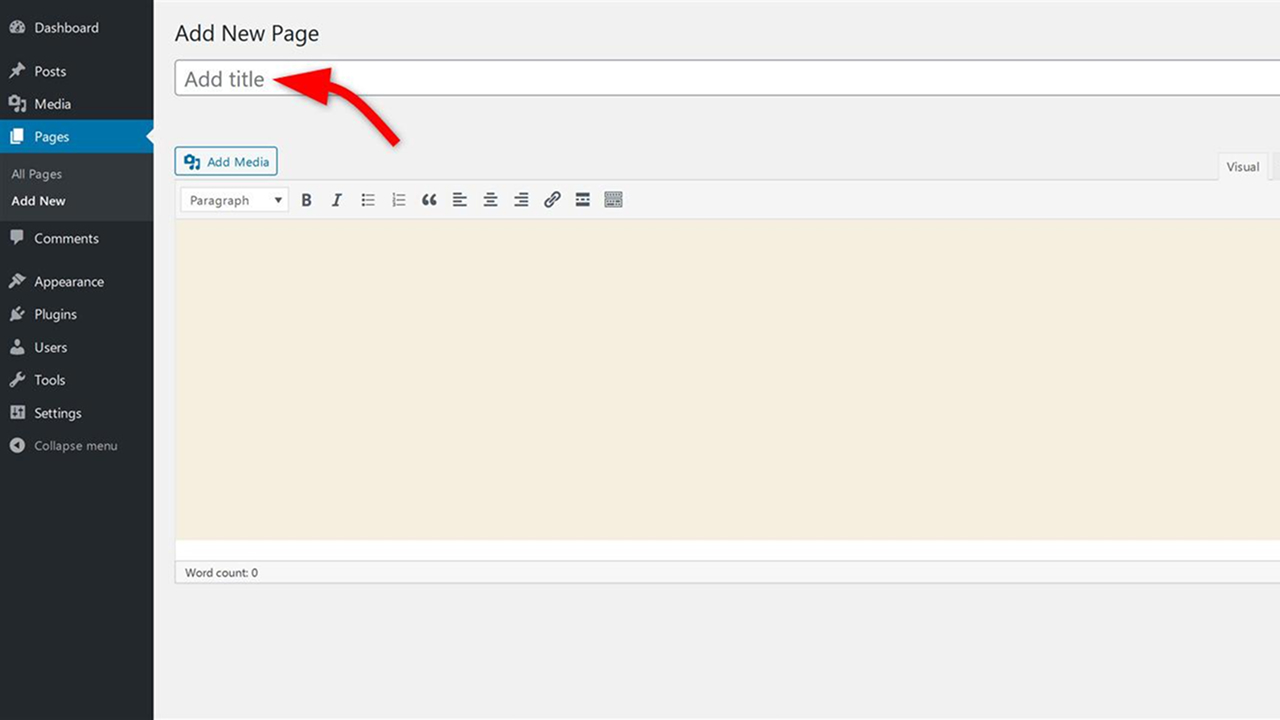
Creating a New Page
To add a new page, go to Pages → Add New in the WordPress dashboard.
Common pages you might want to create:
- Home page (you can set this as a static page later)
- About
- Contact page
- Services
- Blog
Click “Add New,” enter a title, and start adding blocks like paragraphs, images, or buttons. It’s all drag-and-drop and super beginner-friendly.
You can customize your WordPress site’s navigation by going to Appearance and then Menus.
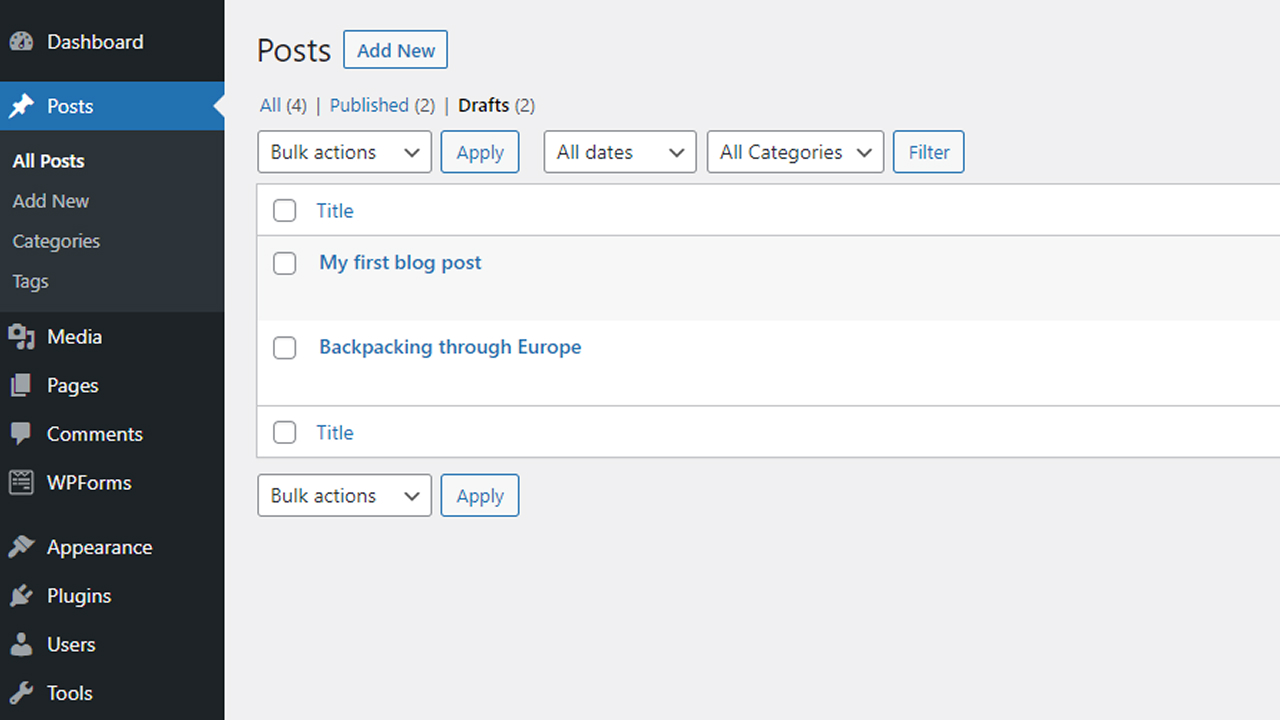
Creating a Blog Post
Posts are generally used for blog entries, while pages are for static content such as an About or Contact page.
If you want a blog, go to Posts → Add New. The process is almost the same as pages, but posts will automatically show up on your blog feed and are organized by date or category.
You can add content just like you did with pages; write text, add links, embed videos, and insert images with just a few clicks.
Using Blocks to Build Content
The block editor gives you tons of customization options. Some blocks you’ll use often:
- Paragraph – for basic text
- Heading – for titles and section headers
- Image – to upload or insert media from your library
- Button – to link to specific pages
- Spacer / Divider – to improve layout and spacing
You can also search for additional blocks or install plugins that add more block types to your editor.
Installing Plugins to Add Features to Your Site
Plugins are one of the best parts of using WordPress. They let you add new features and tools to your site.
Want a contact form? There’s a plugin for contact forms. Need to improve SEO, boost speed, or build an online store? You’ll find a plugin for those, too.
There are over 59,000 free plugins available right inside your WordPress dashboard. Plus, thousands more paid options. Whatever you want to do, chances are someone has already built a plugin for it.
How to Install a Plugin
- Go to Plugins → Add New
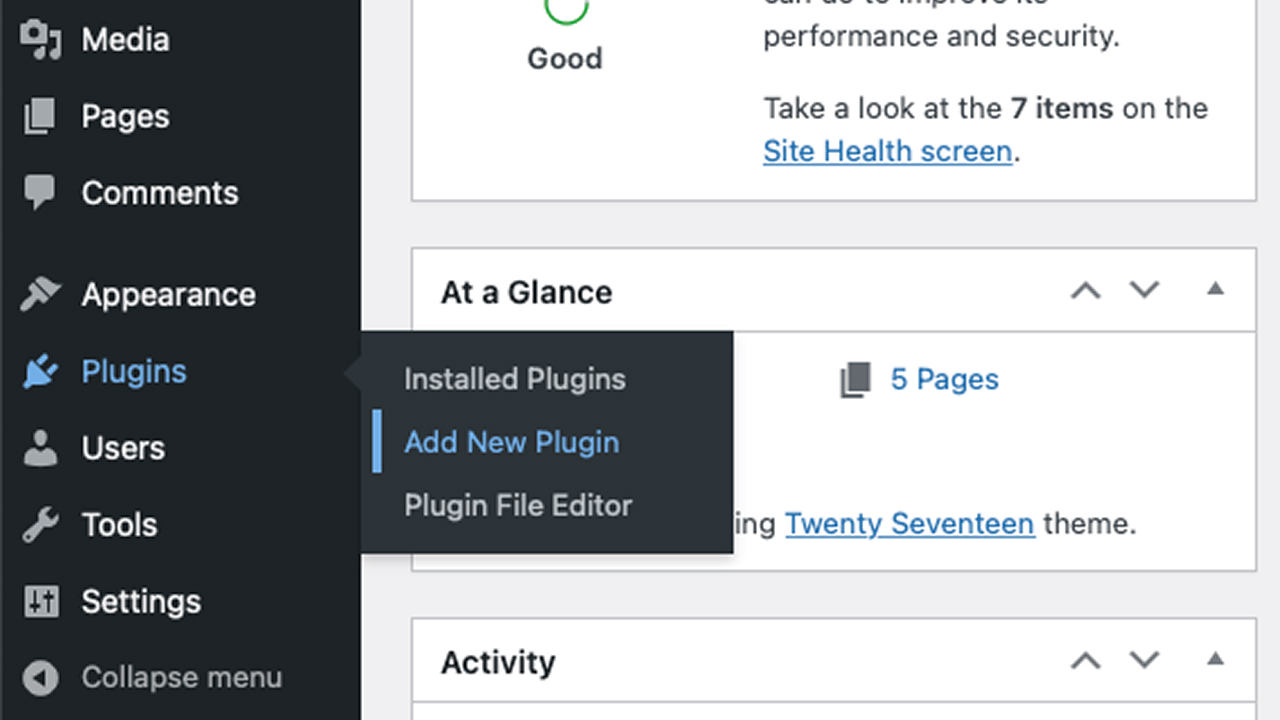
- Use the search bar to find a plugin (e.g. “contact form” or “SEO”)
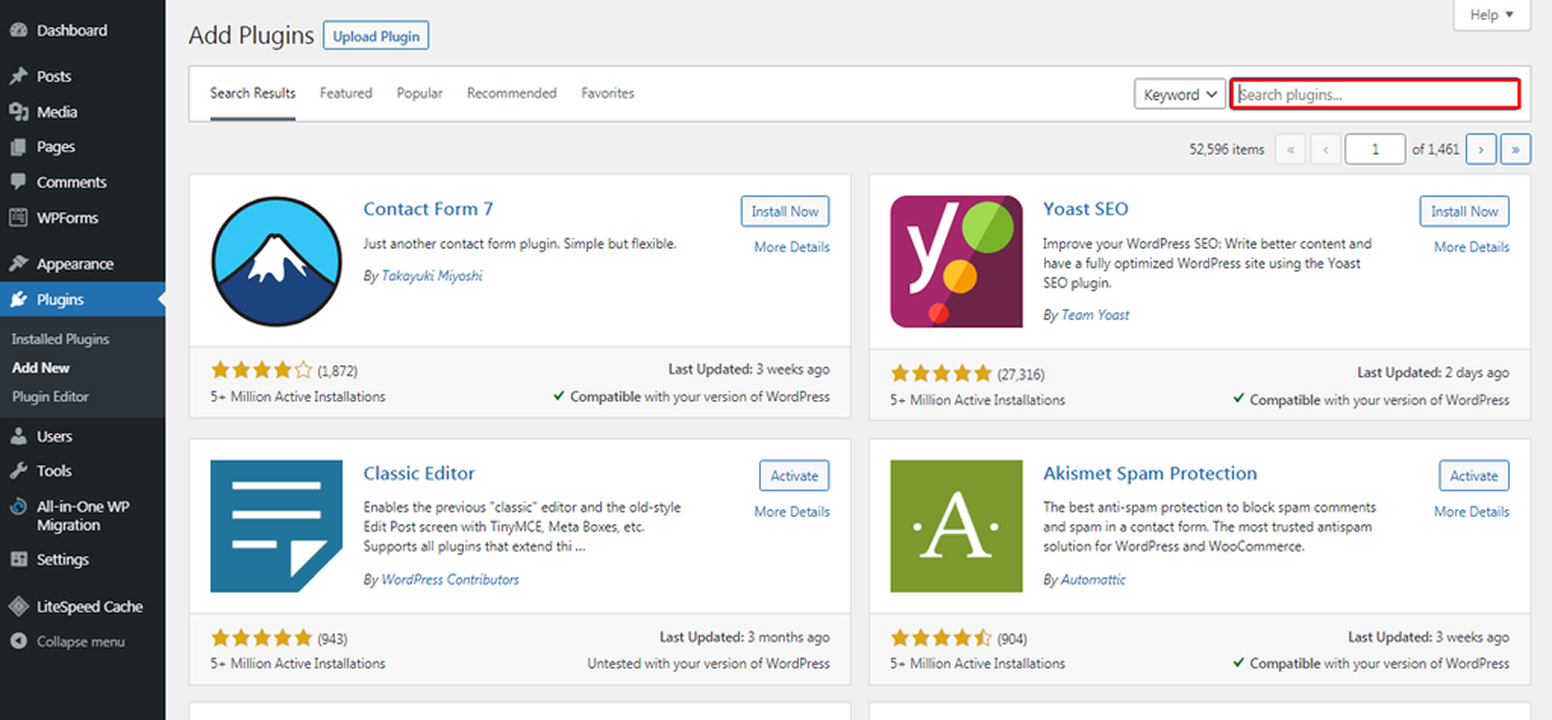
- Click Install Now
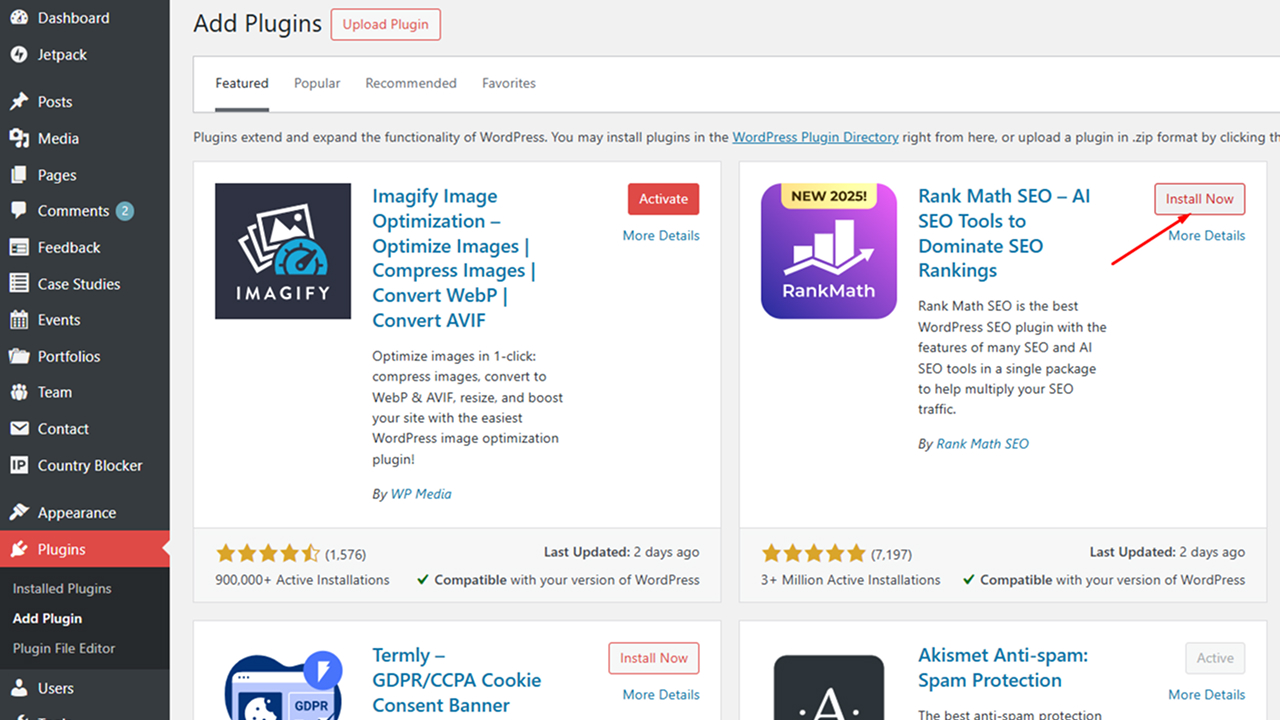
- Then click Activate
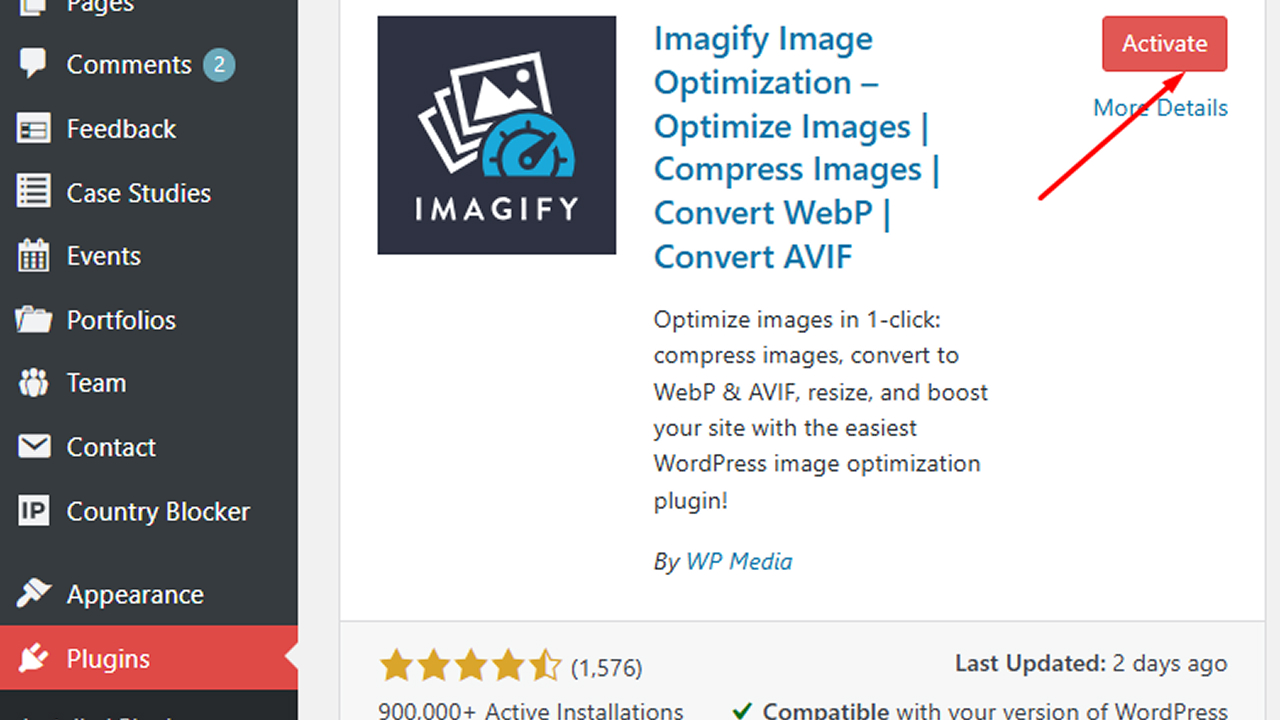
That’s it, your plugin is ready to use now.
Must-Have WordPress Plugins for New Sites
Here are some free plugins that many new users install right away:
- Contact Form 7 – Add a simple form to your contact page
- Yoast SEO or Rank Math – Help improve your site’s visibility on search engines
- WooCommerce – Turn your WordPress site into a full online store
- WPForms – A beginner-friendly drag-and-drop form builder
- Jetpack – Adds security, backups, and performance tools in one
- UpdraftPlus – For automatic file backups
- WP Super Cache – Improve loading times, especially on mobile devices
You can install as many plugins as you need, but try to keep things clean, as too many active plugins can slow your site down.
Basic Settings to Configure First
Let’s start with a few settings. These small tweaks can make a huge difference in how your site looks and works.
You’ll find everything you need under the Settings menu in your WordPress dashboard.
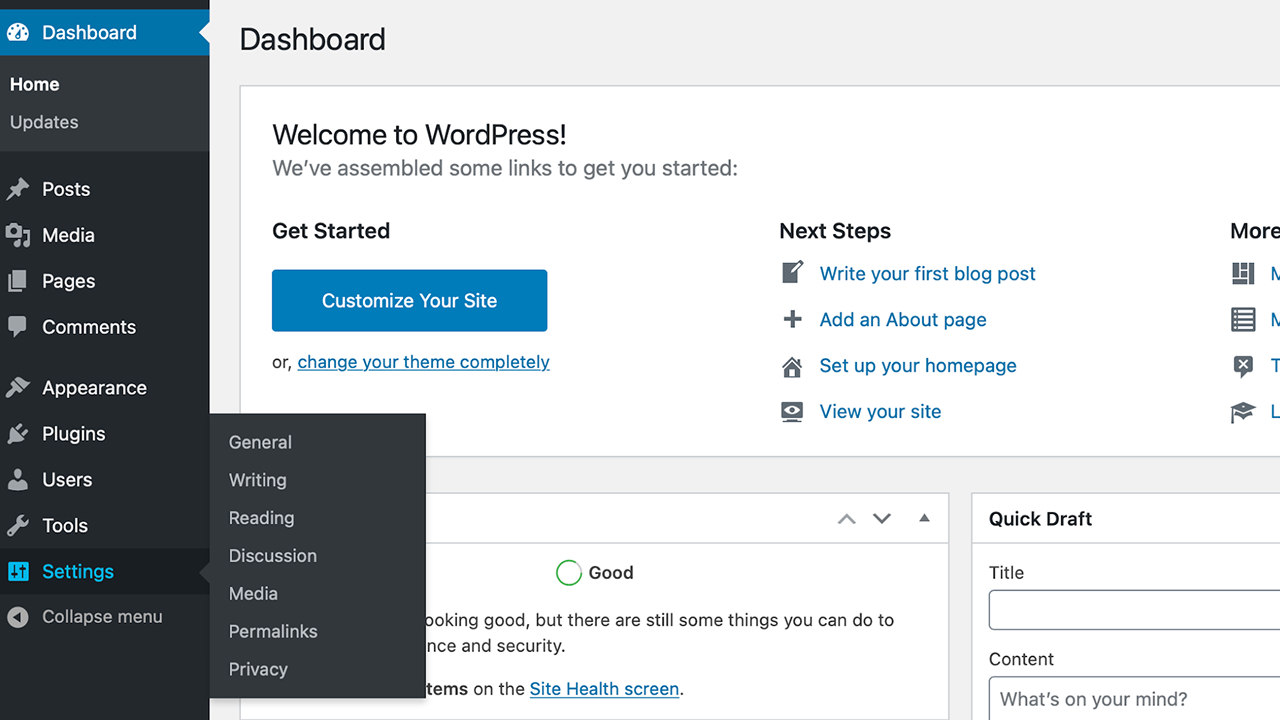
Here’s what to focus on first:
Site Title and Tagline
Go to Settings → General
Add your site title (like your brand or business name) and a short tagline. These often appear in your browser tab and search engine results.
Set a Static Homepage
Go to Settings → Reading
By default, WordPress shows your latest blog posts on the home page. But if you’re building a business site or portfolio, you’ll probably want to set a static page as your homepage.
Choose a static page you’ve already created (like “Home”) and another one for your blog, if needed.
Change Your Permalink Structure
Go to Settings → Permalinks
This affects how your pages and posts appear in the address bar. Select the “Post name” option—it’s cleaner and better for search engines.
Control Comments
Go to Settings → Discussion
If you don’t want people leaving comments on your pages, turn that option off here. You can also control how comments are moderated.
Media and File Settings
If you’re uploading lots of images or videos, check the Settings → Media section. WordPress automatically creates different sizes of each image, which you can adjust here.
These settings take just a few minutes to update, but they’ll help your site look more polished and work the way you want.
Note: Posts are generally used for blog entries, while pages are for static content such as an About or Contact page.
Managing Users and Roles in WordPress
If you’re working with a team or letting clients, writers, or developers into your site, you’ll want to know how to manage users in WordPress.
Every person who logs into your WordPress dashboard has a user account with a specific role. These roles control what they can and can’t do on your site.
How to Add a New User
- Go to Users → Add New
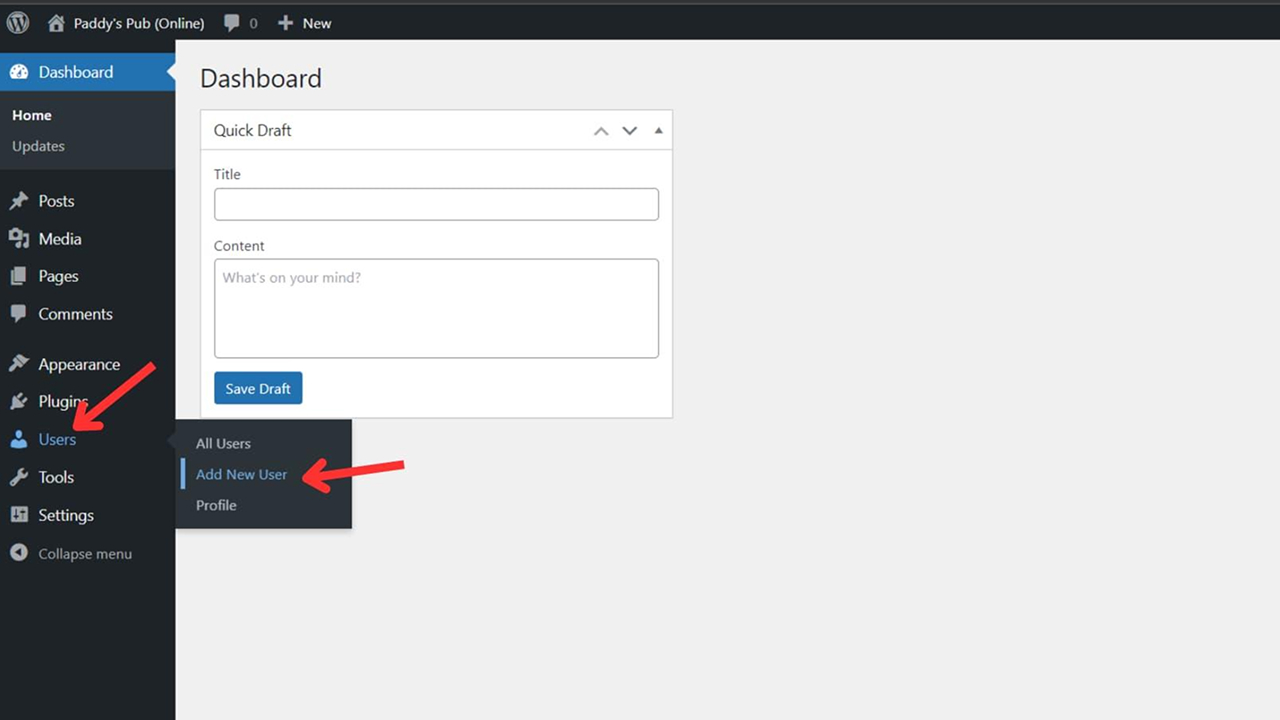
- Enter their username, email, and password
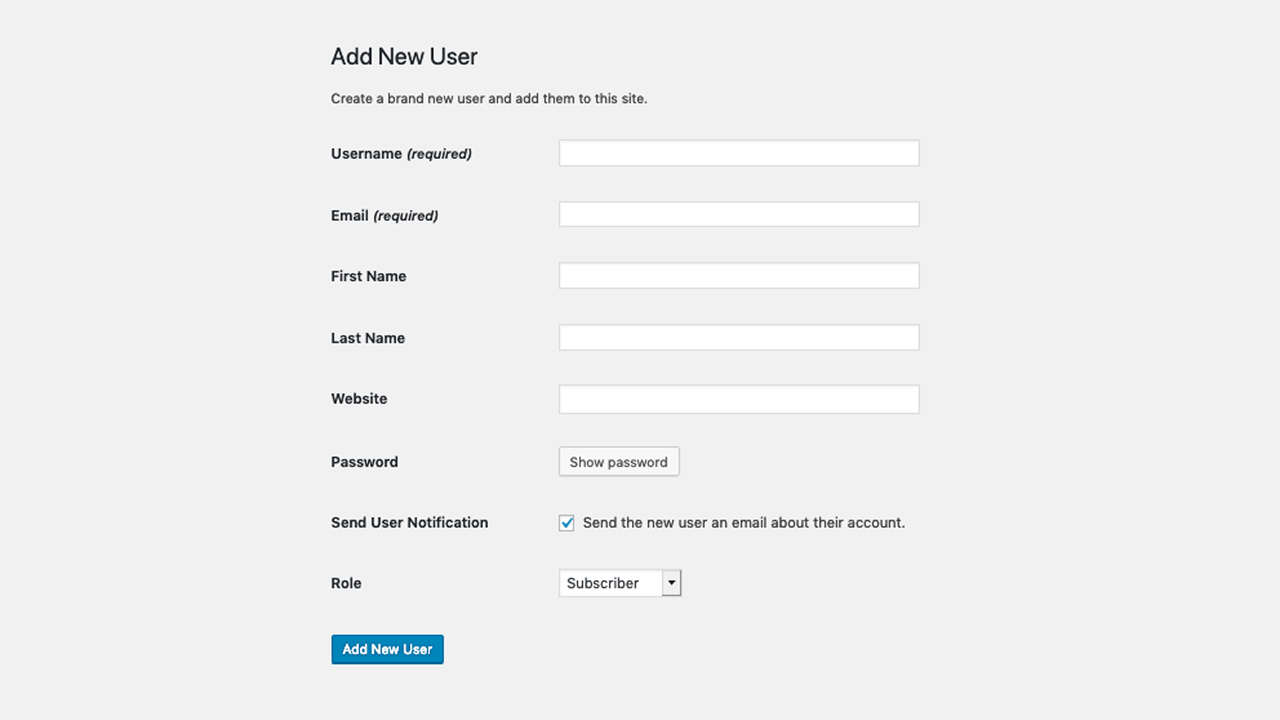
- Assign a role
- Click Add New User
That’s it. The new person will get access to your site based on the role you assign.
Understanding WordPress User Roles
Here are the main roles you’ll see:
- Administrator – Full control. Can change settings, add plugins, manage other users—everything.
- Editor – Can edit, publish, or delete any page or post, even ones they didn’t write.
- Author – Can write and publish their own posts, but can’t touch others.
- Contributor – Can write, but not publish. An admin or editor needs to approve it.
- Subscriber – Can log in and manage their own profile, but can’t edit the site.
When to Use This
- Giving your developer or designer limited access
- Letting clients log in to view their site without changing anything
- Running a blog with multiple authors
- Managing roles on a membership or online store
You don’t need any advanced WordPress skills to manage users—it’s all point and click.
Keeping Your WordPress Site Secure and Up to Date
Once your WordPress website is live, your job isn’t over. To keep things running smoothly and keep visitors safe, you’ll need to do a little regular maintenance.
It doesn’t take long, but it’s something every site owner should stay on top of.
Keep WordPress Updated
WordPress regularly releases updates to improve security and fix bugs. You’ll also see updates for your themes and plugins.
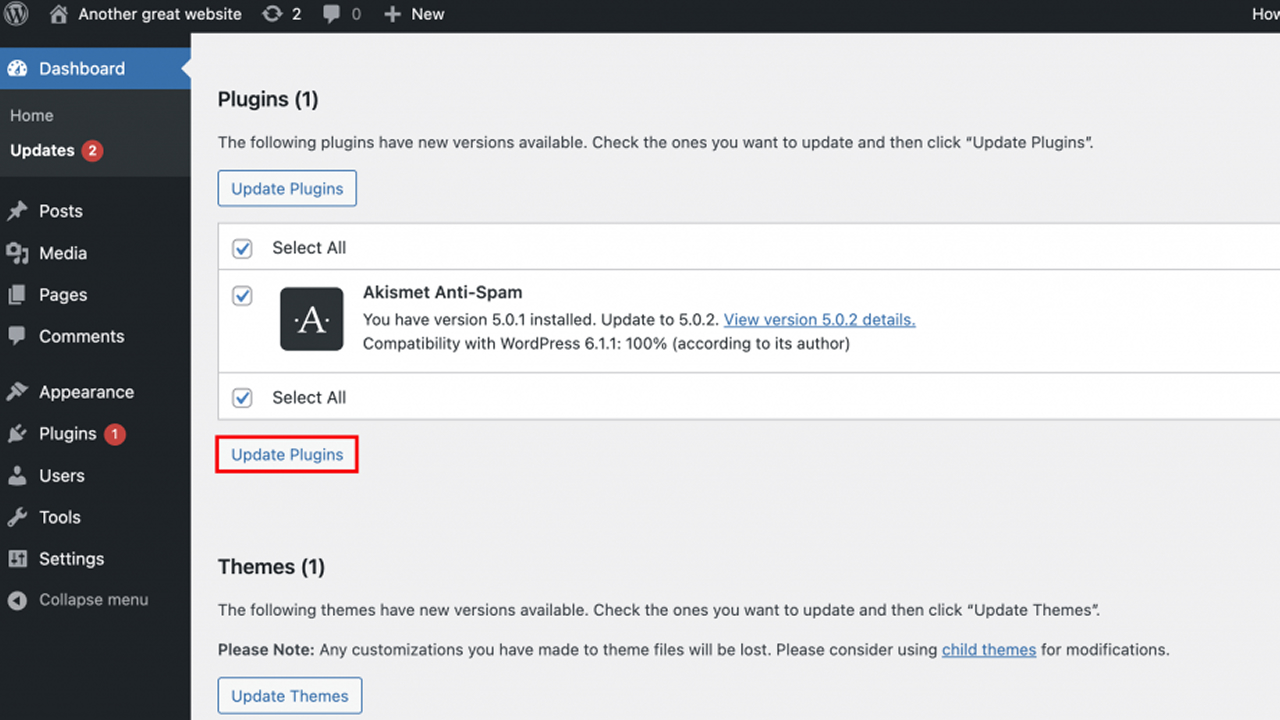
To check for updates:
- Go to Dashboard → Updates
- You’ll see a list of everything that needs updating
- Click Update Now to install the latest version
Keeping things updated helps your site run better and stay protected.
Use a Security Plugin
WordPress is secure out of the box, but it’s still smart to install a security plugin. These help block spam, scan for malware, and prevent unwanted access.
Some popular (and often free) options:
- Wordfence
- Sucuri Security
- iThemes Security
Most of these come with built-in tools for firewalls, login protection, and real-time monitoring.
Back Up Your Site
Things can go wrong, so it’s a good idea to back up your files, pages, and database regularly. That way, if something breaks, you can restore your site quickly.
You can use plugins like:
- UpdraftPlus
- Jetpack Backup
- BackWPup
Many hosting providers also offer automatic backups, which can save you time and effort.
Clean Up Unused Content and Plugins
Over time, your dashboard can get cluttered with unused plugins, themes, and draft pages. It’s worth noting to do a little cleanup now and then to keep things fast and tidy.
Take a few minutes regularly to:
- Delete unused plugins and themes
- Clear out old drafts or trashed posts
- Optimize your media library by removing unused images
Conclusion
WordPress is one of the most flexible and beginner-friendly ways to build a website. Whether you’re creating a blog, showcasing your business, or launching a full online store, WordPress gives you everything you need to get started, even if you’ve never built a website before.
The most important thing is to just start. Pick a simple theme, write a few pages like Home and About, and add features as you go. You don’t need to do everything at once.
As you get more comfortable, you can explore more options like adding plugins, customizing your design, or trying out new features. And if something doesn’t work the way you want, there are plenty of tutorials, forums, and friendly people in the WordPress.org community who can help.