Reviews on

A decade ago, building a website definitely meant hiring a developer, messing with complicated code, and paying someone every time you needed to update a page.
That’s changed, a lot of it.
These days, WordPress makes it possible for just about anyone to set up and run their own WordPress website, no coding required.
But before you can design pages, add your logo, or write your first blog post, you need to install WordPress properly on your web server.
And if I’m honest, this is where most people get stuck. Yes, there are so many tutorials out there, but half of them either skip important steps or make things sound way more complicated than they really are.
So here we are! In this post, we’re going to keep it simple. You’ll see exactly how to install WordPress, from start to finish.
- Set up a database and a user in your hosting control panel, as you’ll need these details for WordPress to work.
- Download the WordPress files from WordPress.org and upload them to your server, or use your host’s one-click install option.
- Open your site’s URL in a browser to start the WordPress setup wizard.
- Enter your database name, username, and password when prompted to connect WordPress to your database.
- Complete the setup by creating your site title, admin username, and password, then log in, and you’re ready to customize.
Before You Click Install: What You’ll Need
Before you jump into learning how to install WordPress, there are a few things you should have ready.
- A Domain and Hosting
To install WordPress, you’ll need a domain name (like yourwebsite.com) and a really good hosting provider. Most hosting plans these days come with a quick WordPress install option, but you’ll still need to connect your domain to your web server. - Database Details
WordPress needs a place to store all your stuff and that’s where the MySQL database comes in. Make sure you have your database name, username, password, and host info ready. You’ll usually set this up in your hosting control panel. - FTP Client (Optional)
If you’re planning to upload the WordPress files manually, you’ll want an FTP client. It’s just an easy way to move files from your computer to your hosting server. - Login Info
Pick a good username and password for your WordPress dashboard. Avoid “admin” as your username; it’s an easy target for hackers. Use a strong password, too.
Our WordPress experts at cmsMinds can handle your installation, setup, or migration, so you can focus on your content instead of tech headaches.
Use the One-Click WordPress Installer (Most Common Method)
In most circumstances, especially if you’re using a hosting company like Bluehost, SiteGround, or HostGator, the easiest way to install WordPress is through the one-click installer in your control panel.
Here’s how:
- Log in to your hosting account
- Open the control panel (often called cPanel)
- Look for the WordPress button or an app installer like Softaculous or Installatron
- Click Install WordPress and choose your domain name
- Fill in basic site info like your site title, admin username, strong password, and correct email address
- Choose your language and preferred options (some offer a checkbox for search engine visibility)
- Click Install, and wait a few seconds
Once complete, you’ll see a confirmation with the login URL and your login credentials for accessing the WordPress dashboard.
Note: This is the preferred method for most users; fast, simple, and no need to manually handle WordPress files, databases, or a web server.
How to Install WordPress the Right Way (Step-by-Step Guide)
If you prefer to manually install WordPress either because your hosting provider doesn’t offer one-click install, or you want more control over the process, this guide walks you through it. It’s a simple process when broken into clear steps.
Let’s go through exactly how to install WordPress on your own server or live hosting account.
Step 1: Download WordPress
Start by visiting WordPress.org and downloading the latest version of WordPress. This will come as a compressed zip file, which contains all the core WordPress files needed to run your site.
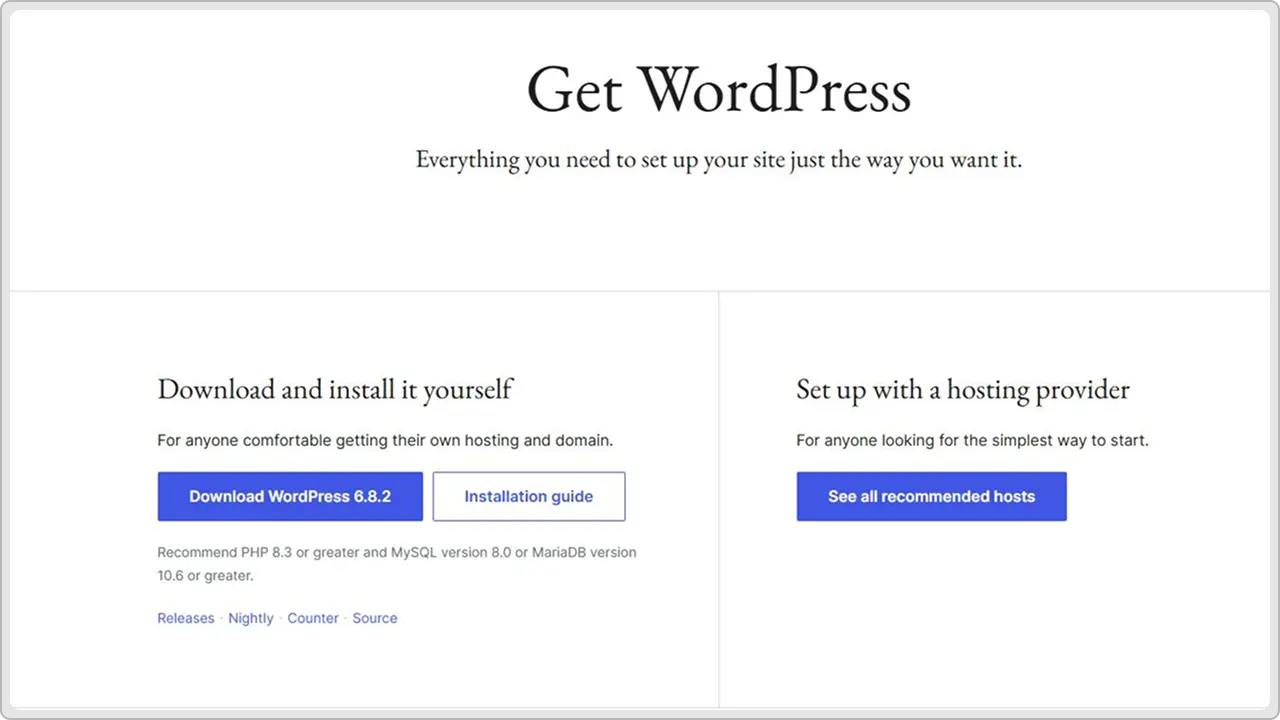
Once downloaded, extract (or unzip) the file on your local computer. Inside, you’ll find a folder named wordpress that contains everything required for the installation. You’ll be uploading these files to your server in the next step.
Step 2: Upload WordPress Files to Your Hosting Server
After extracting the WordPress package, you need to transfer the files from your computer to your hosting server.
There are two ways to do this, depending on what you’re more comfortable using.
Option 1: Using an FTP client (like FileZilla)
Open your preferred FTP client, such as FileZilla, and connect it to your web hosting account using the FTP credentials provided by your hosting company.
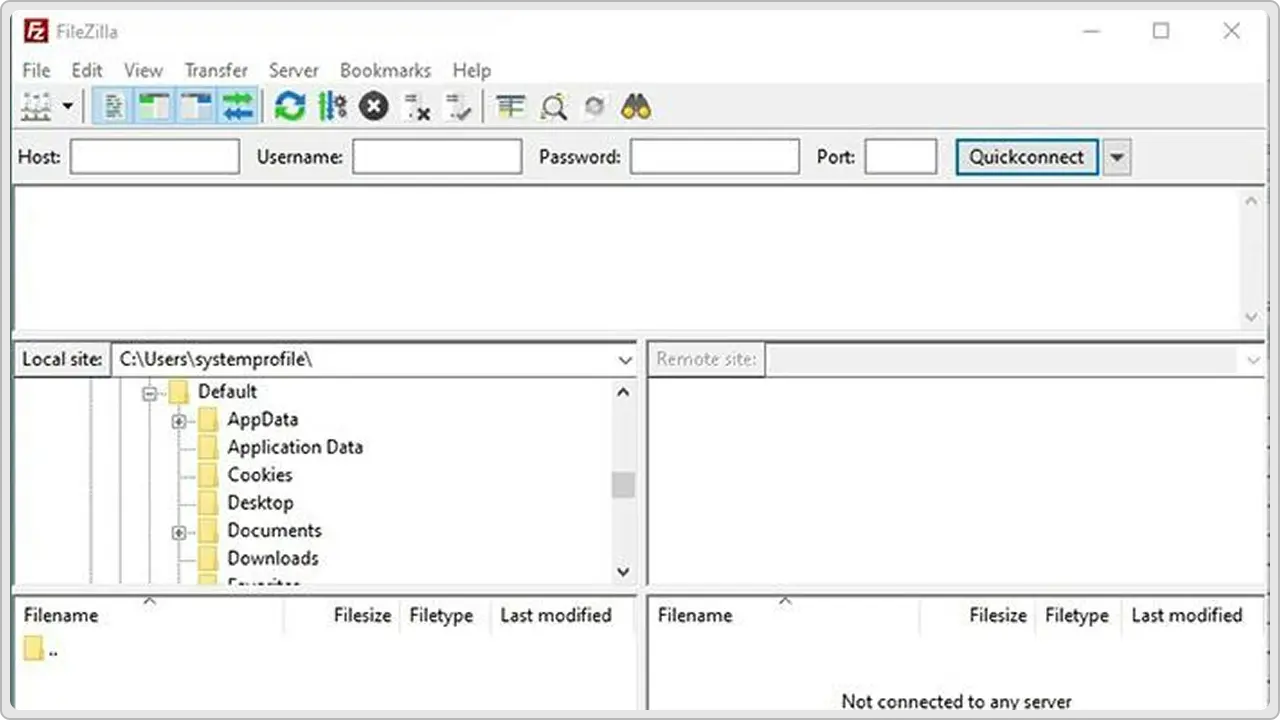
Navigate to the root directory for your domain; usually called public_html or www.
Then upload all the contents inside the wordpress folder directly into that root directory. Be careful not to upload the entire folder, just the files and folders it contains.
Option 2: Using File Manager in cPanel
If you’d rather not use FTP, log into your hosting account’s control panel (commonly cPanel) and open the File Manager.
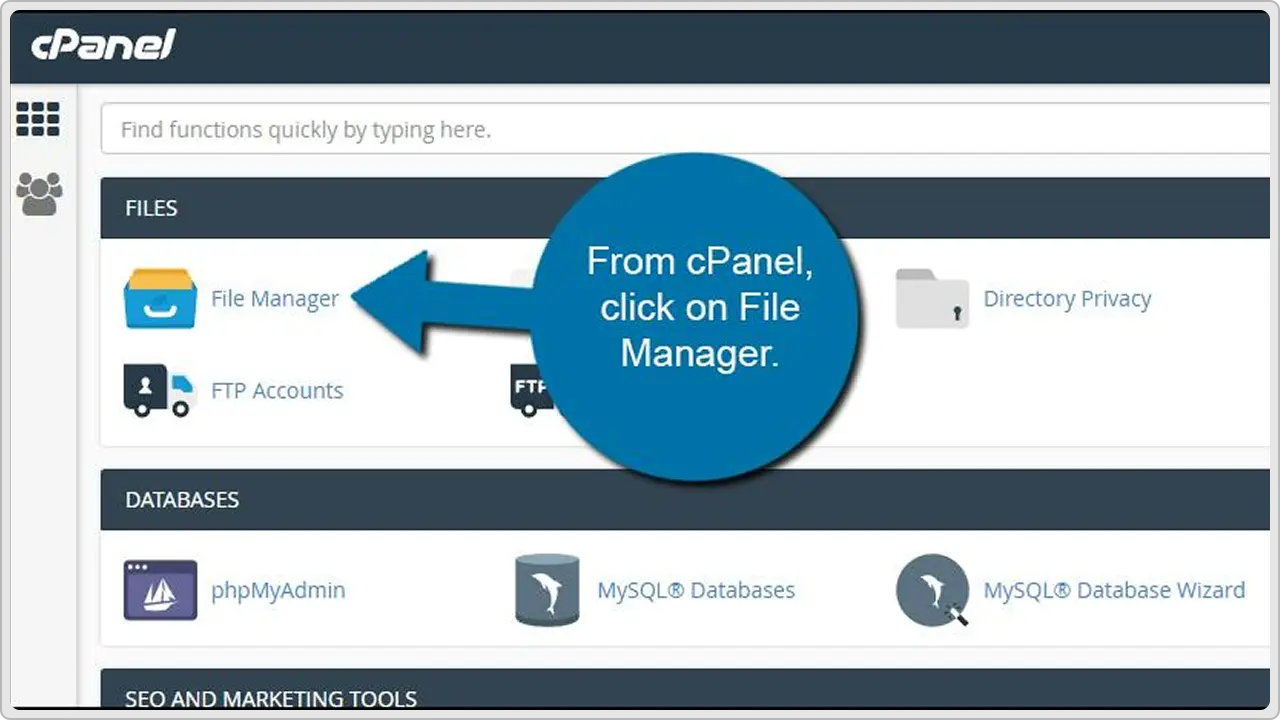
Navigate to your domain’s root directory, click “Upload,” and choose the original zip file you downloaded from WordPress.org.
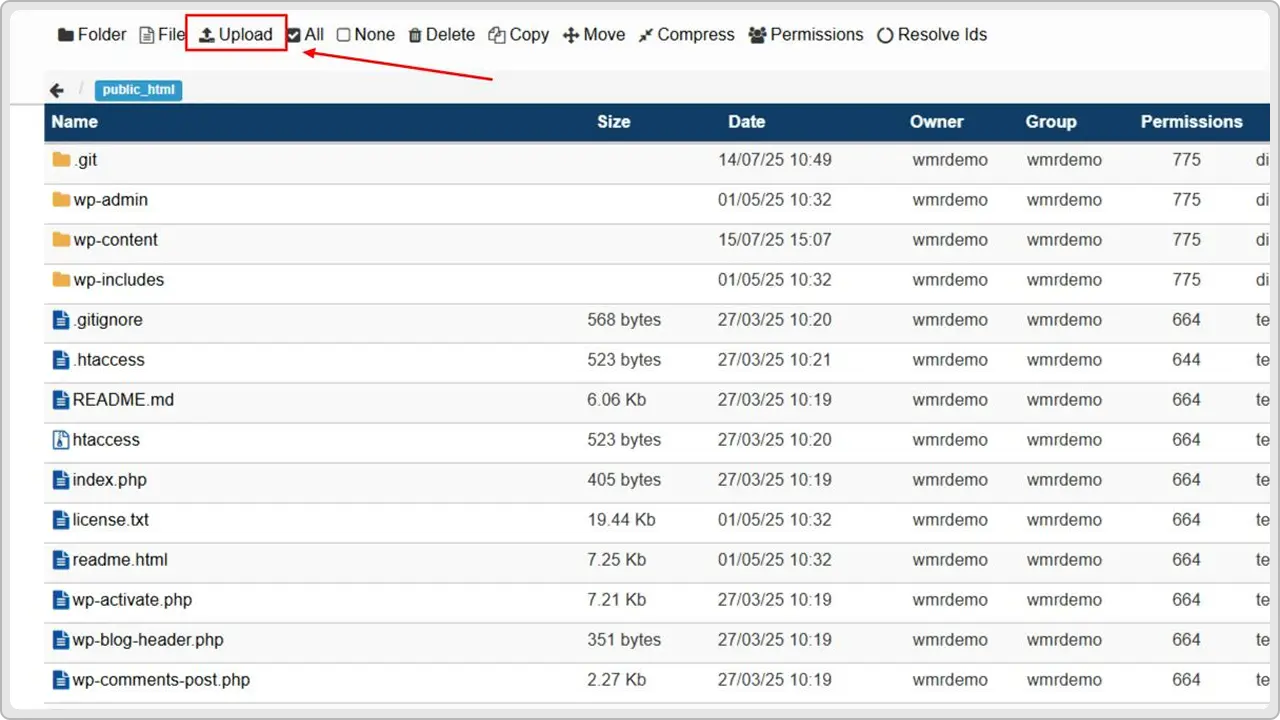
Once it’s uploaded, use the “Extract” option to unpack the files.
If they extract into a subfolder named wordpress, move the files out into the root directory so your site loads properly at yourdomain.com.
In both methods, your goal is the same: get the WordPress files onto your web server in the correct location.
Step 3: Create a MySQL Database and User
Now that your files are in place, WordPress needs somewhere to store your website’s content, and that’s where a MySQL database comes in.
To create one, go back to your hosting control panel and find the MySQL Databases section.
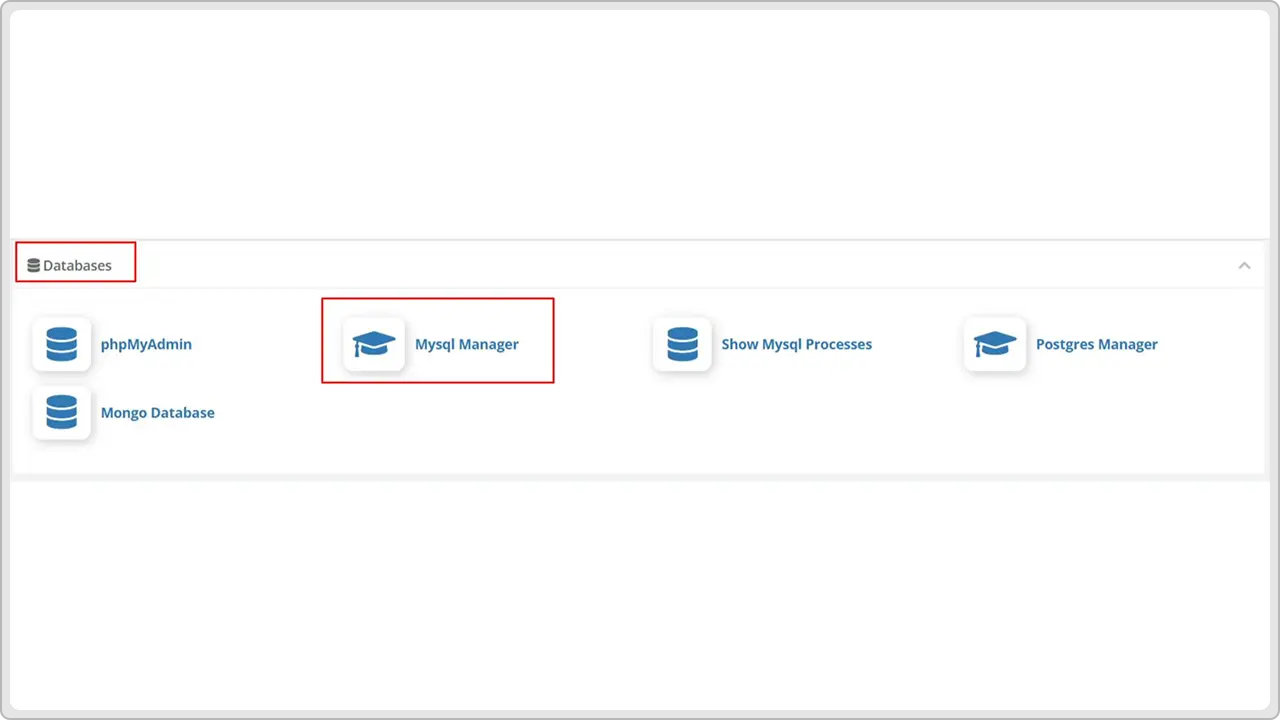
Start by creating a new database and giving it a name that’s easy to remember.
Next, create a database user, assign it a secure password, and then add that user to the database you just created. Be sure to give it all privileges.
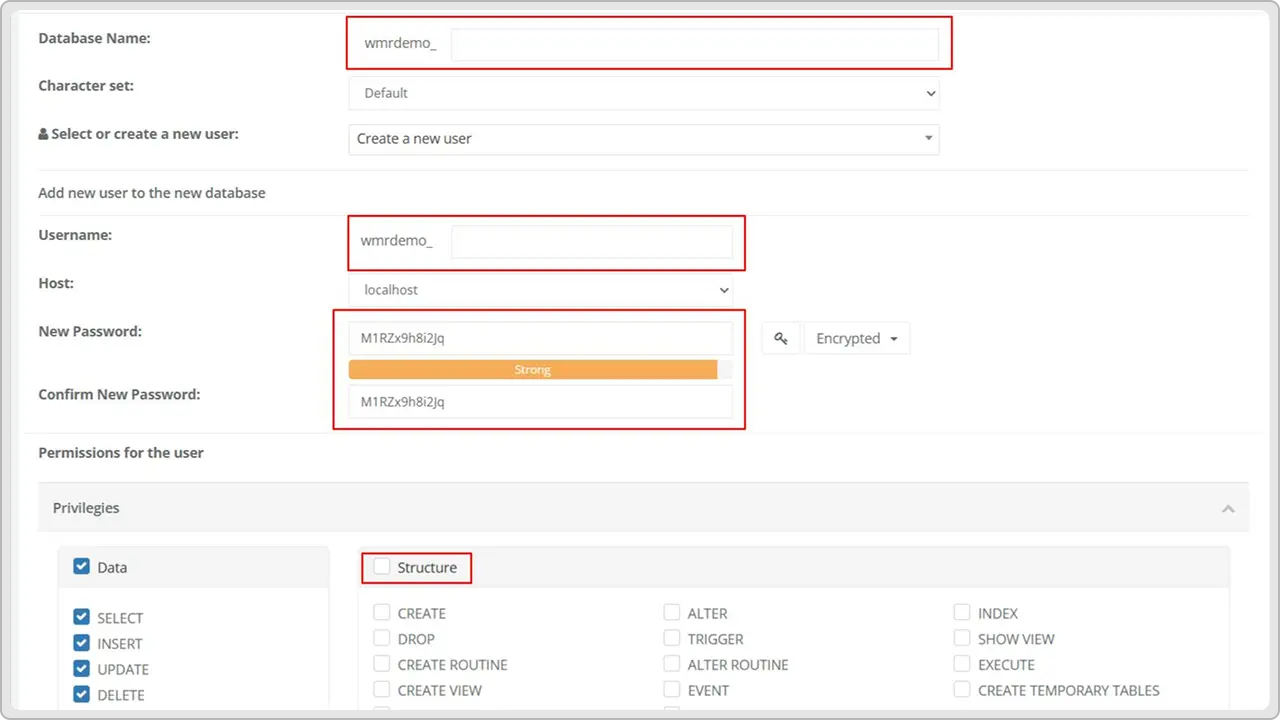
These three pieces: the database name, username, and password are known as your database credentials, and you’ll need them in the next step.
Make sure to write them down or copy them somewhere safe.
Step 4: Configure the wp-config File with Your Database Information
With your database created, it’s time to connect it to WordPress. This requires editing the wp-config.php file, which controls how WordPress communicates with your MySQL database.
Using your FTP client or File Manager, locate the file called wp-config-sample.php in your WordPress directory.
Rename it to wp-config.php. Then open it in a text editor and scroll to the section that looks like this:
define( ‘DB_NAME’, ‘database_name_here’ );
define( ‘DB_USER’, ‘username_here’ );
define( ‘DB_PASSWORD’, ‘password_here’ );
Replace the placeholders with the actual database information you created earlier: the database name, user, and password. If your host uses a custom database host (instead of localhost), be sure to update that as well.
Once done, save the file and close it. WordPress can now connect to your new database during the installation.
Step 5: Run the WordPress Installation Script
With everything in place, you’re ready to run the actual WordPress install process.
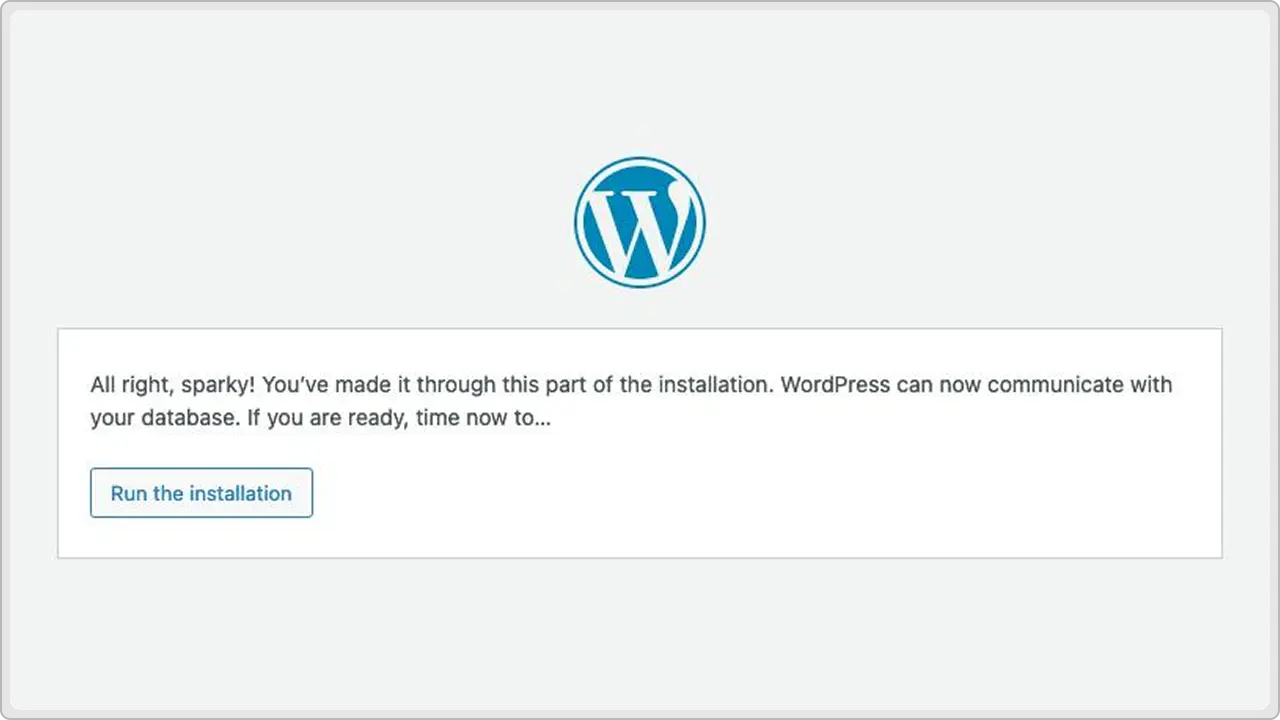
Open your web browser and go to your domain name (e.g., yourdomain.com). If all files are uploaded correctly and the database connection works, you’ll automatically be taken to the WordPress install page.
First, select your preferred language and click “Continue.” On the next screen, you’ll enter your site title, choose a username and strong password for the WordPress admin account, and enter your email address.
You’ll also see an option to discourage search engines from indexing the site. Check this only if you’re not ready to launch yet.
Once everything looks good, click the Install WordPress button. WordPress will finalize the setup, create the necessary tables in your database, and redirect you to the login page.
That’s it, your WordPress website is now installed and ready to go.
Common Installation Problems & How to Fix Them
Even when you follow every step, WordPress can still throw an error or two your way (Sometimes, more than two). Here are some common WordPress problems and simple ways to fix them.
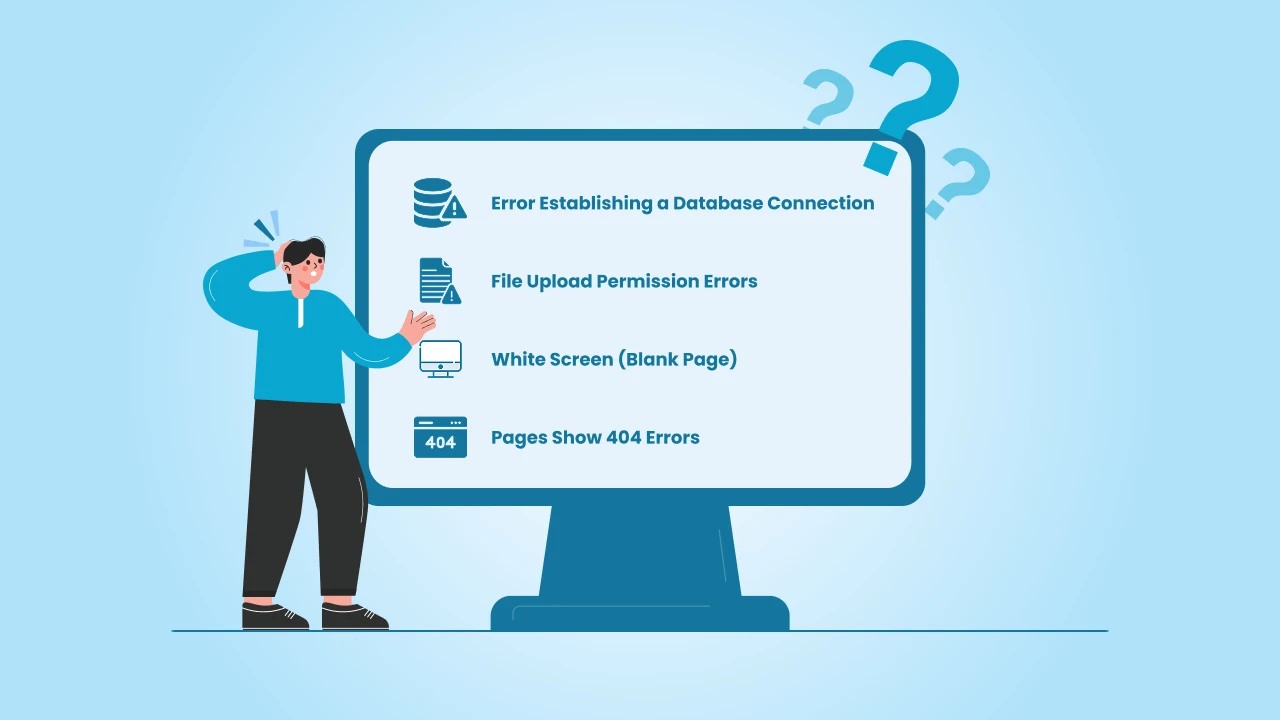
1. Error: “Error Establishing a Database Connection”
This means WordPress can’t connect to your database. It usually happens when the database details in your wp-config.php file don’t match what you set up on your host.
How to fix it:
- Check your database name, username, and password.
- Look out for small typos or extra spaces.
- Some hosts use localhost for the database host, but some need a specific name so check with your host if you’re not sure.
2. File Upload Permission Errors
If you see messages like “Permission denied” when you try to upload files, it’s probably a folder permission issue.
How to fix it:
- Log in to your hosting control panel or use an FTP app.
- Check that your folders are set to 755 and your files to 644.
- If this sounds confusing, your hosting provider can sort this out for you quickly — just send them a message.
3. White Screen (Blank Page)
If your site just shows a blank white page, it usually means there’s a small error in your code or a plugin conflict.
How to fix it:
- If you have plugins installed, rename your plugins folder to turn them off.
- Check your wp-config.php file for any typos if you edited it manually.
- Make sure your hosting server is running a supported PHP version (WordPress recommends PHP 7.4 or higher).
4. Pages Show 404 Errors
You’ve installed WordPress, but when you click on a page, you see a 404 error instead.
How to fix it:
- Log in to your WordPress dashboard.
- Go to Settings → Permalinks and click Save Changes — this resets your permalinks and usually fixes the problem.
Where to Get Help
Even with the best of the best step-by-step guides, you might run into something unexpected. Now, the good news is you don’t have to figure it out alone, scratching your head thinking what to do. Instead, here are a few places you can turn to for help:
- WordPress.org Support Forums
The official forums are full of people who’ve run into the same problems. You can search for your error message or ask a question if you don’t see an answer yet. - Helpful Communities
There are lots of friendly Facebook groups and online communities where people share tips, solutions, and advice. Just search for “WordPress Help” or “WordPress Support” and join a group that looks active and welcoming. - Your Hosting Provider
Most hosting companies have great support teams. If you get stuck, open a support chat or ticket. They’re used to fixing WordPress problems — it’s what they do all day. - Need More Help?
If you offer help yourself (like WordPress consulting, WordPress design, WordPress development, or troubleshooting), drop your contact info here. Let people know how they can reach you.
Conclusion
And that’s it, you’ve just learned how to install WordPress step by step.
It might feel like a lot at first, but once you’ve done it, you’ll see how simple it really is.
Remember, getting your site online is just the starting. Take your time to explore the dashboard, try out different themes, and add pages and posts at your own pace.
If you ever get stuck, don’t worry, there are tons of people and resources out there ready to help.
Most importantly, enjoy building your site and making it your own. You’ve got everything you need to get started, so now go create something amazing.
With cmsMinds, you get expert help for updates, security, backups, and anything else WordPress throws your way.