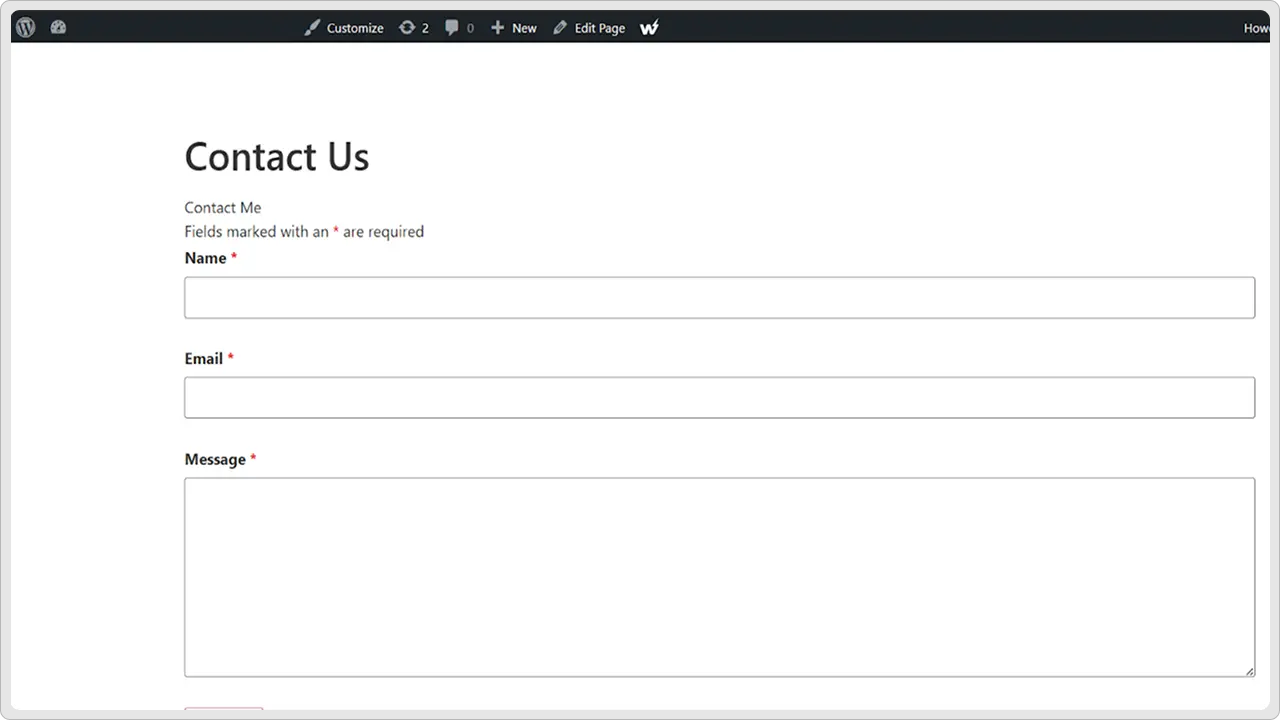
Are you looking for a simple way for your customers or website visitors to get in touch with you? Then you definitely need a good form plugin.
One of the easiest and most popular options out there is Ninja Forms. It lets you create all kinds of forms, from basic contact forms to more advanced ones, without any coding or complicated setup.
Just drag and drop the fields you want, hit save, and you’re good to go.
In this quick guide, I’ll show you how to create a Ninja Forms in WordPress. This is going to be a straightforward way to help people reach you.
- Add the free Ninja Forms plugin to your WordPress site from your dashboard and activate it.
- Use the form builder to start with a pre-built template or a blank form, then drag and drop fields like first name, email, or custom fields.
- Configure your email notifications, success messages, and advanced options like conditional logic or spam protection.
- Use the Ninja Form block or shortcode to place your form on any page or post.
- Fill out the form, hit the submit button, verify that everything works, and then go live.
Why Use Ninja Forms?
When it comes to building forms on WordPress sites, honestly, you will have a lot of options, but Ninja Forms stands out from the rest.
This powerful form builder makes it super easy to create forms, add custom fields, and even set up advanced features like conditional logic without writing any PHP or dealing with complicated code.
There’s more: With Ninja Forms Core, you get all the basics you need for free, like the ability to make a contact form, collect email addresses, and display a submit button that actually works, and the list goes on
Another fantastic thing about Ninja Forms is its pre-built templates. These give you a quick starting point so you don’t have to create every form from scratch. You can simply start with a blank form, too, if you’d rather customize everything yourself.
Plus, you get a clean, user-friendly Ninja Forms dashboard right inside your WordPress admin. From there, you can create, edit, delete, and manage all your forms in one place.
For instance, need to make changes on the go? Just open your form, adjust the fields in the right-hand sidebar, and hit save.
That’s all.
So, whether you want to add a simple contact form to a new page or build something more advanced with custom fields and conditional logic, Ninja Forms has you covered.
Now, let’s look at how to create a form in WordPress using the Ninja Forms plugin. This step-by-step guide will help you save time and money by avoiding the need to hire WordPress developers or a WordPress agency.
Want your forms done right? The team at cmsMinds can build and customize them for you.
What You Need Before You Begin
There are just a handful of things to get you started with creating a Ninja form for your WordPress website.
- You’ll need an active site where you can install the Ninja Forms plugin. So make sure your WordPress version is up to date for best security and performance.
- You should have an admin account so you can install plugins, create pages or posts, and customize settings.
- Think about what information you want to collect. For example, do you just need a first name field, an email field, and a message box? Or maybe you need file uploads, conditional logic, or custom fields? Knowing this will help you choose the right pre-built template or blank form.
Read More: Gravity Forms vs WPForms
Steps To Create a Ninja Form in a WordPress Site
Now, let’s jump into the actual process of Ninja form creation for your WordPress website.
Step 1: Install and Activate the Ninja Forms Plugin
First, you need to add Ninja Forms to your WordPress site.
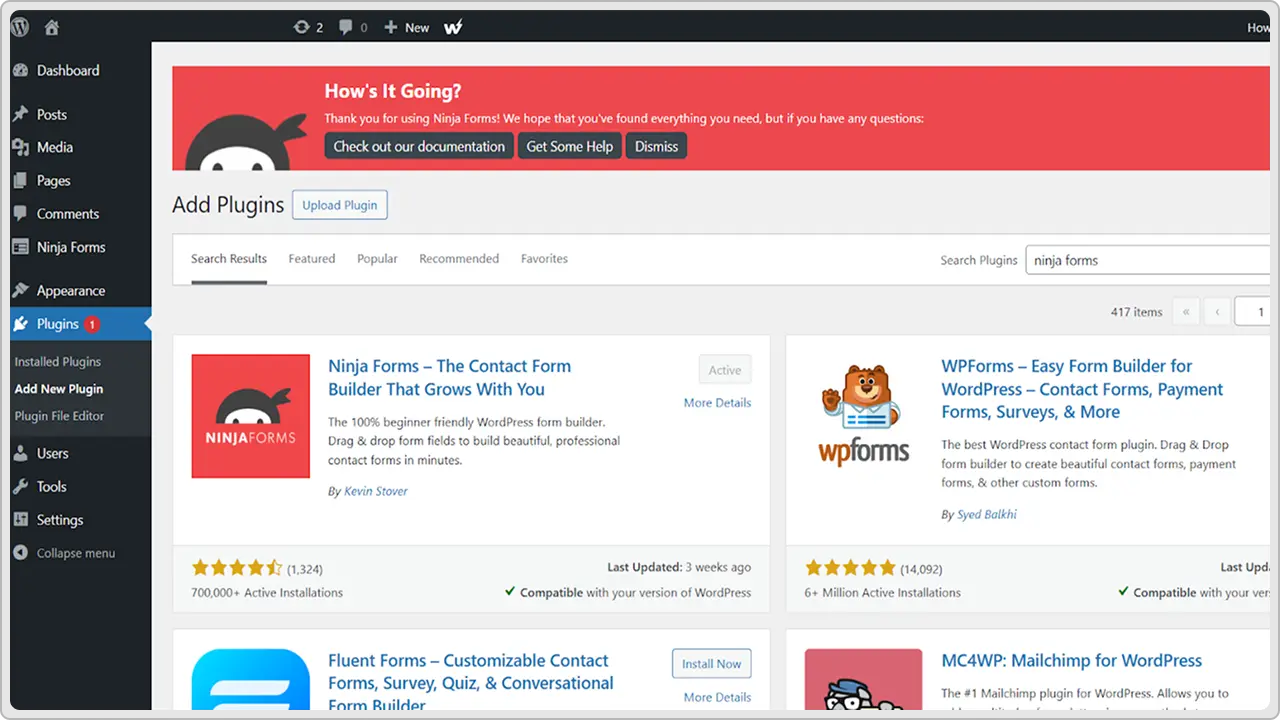
Log in to your WordPress dashboard, then go to Plugins > Add New. In the search bar, type Ninja Forms and look for the one with the ninja logo; that’s the official Ninja Forms Core plugin.
Click Install Now, then Activate.
Once it’s active, you’ll see Ninja Forms in your left-hand menu. This is where you can create, edit, and manage all your forms.
Always make sure your plugin is up to date to keep your site safe and working well.
Step 2: Create Your First Form
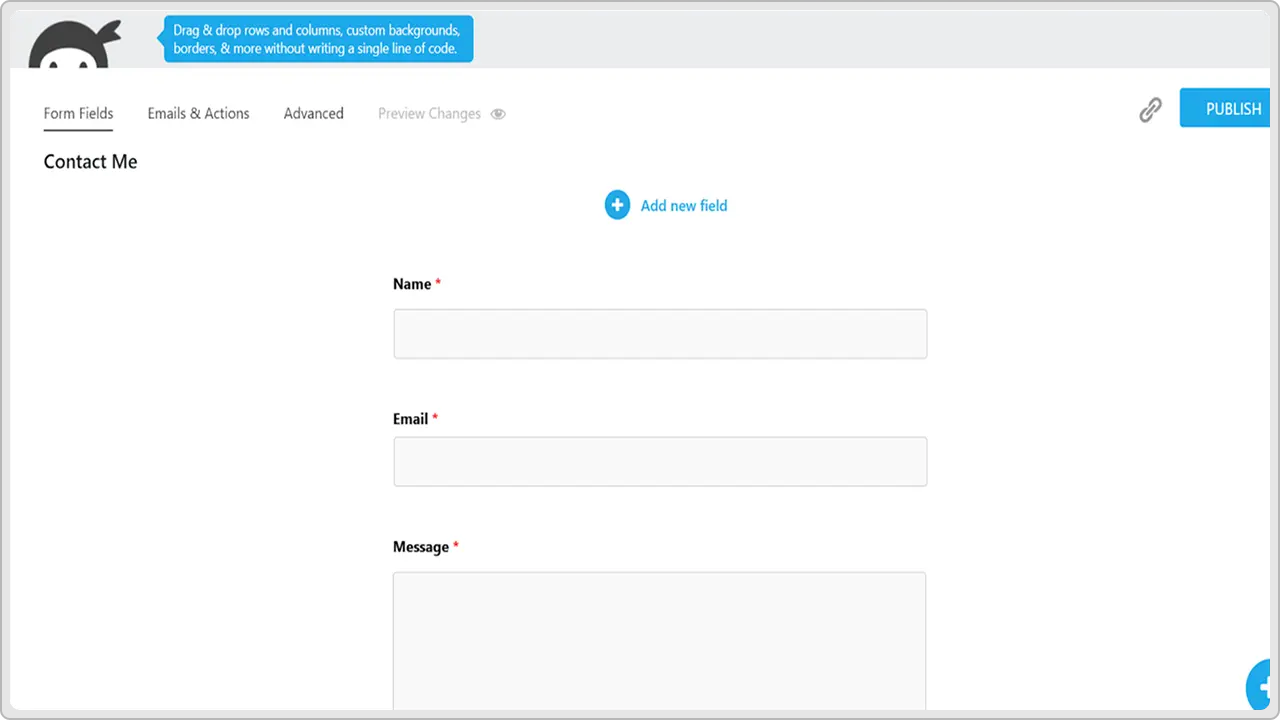
To make your first form, click on the Ninja Forms dashboard, then click Add New. You will see some pre-built templates, like a contact form or sign-up form. These save you time. If you want to build your own, choose the blank form.
With the form builder, you can drag and drop the fields you need.
For example: a first name field, an email field, a message box, or any custom fields you want. You can also add file uploads if needed.
You can use the right-hand sidebar to edit each field’s label, default value, or make it required.
Don’t forget to add a submit button so users can send their information. When your form looks good, click Save.
Step 3: Check Your Form Settings
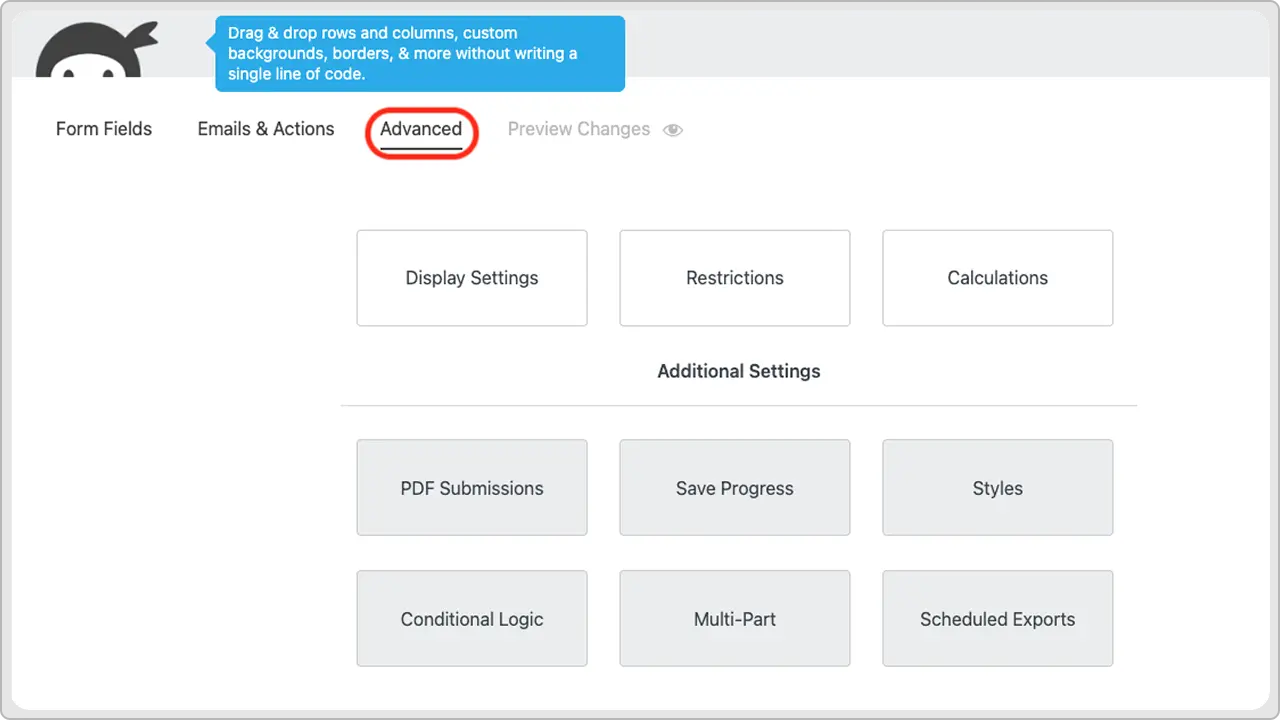
Next, you need to check what happens when someone submits your form. Click on Emails & Actions in the form editor.
By default, Ninja Forms will send an email notification to you when someone fills out the form. You can change the email action, add your own email address, and use a merge tag to include the user’s name or email in the message.
You can also show a thank-you message, send people to a new page, or display a custom screen. If you want more advanced features, you can use conditional logic with the Conditional Logic Add-On or add spam protection.
When you’re done, click Save. Your form is now ready to be added to your site.
Step 4: Add Your Form to Your Site
Now it’s time to put your form where your visitors can see it. Ninja Forms makes adding forms to your WordPress site really easy.
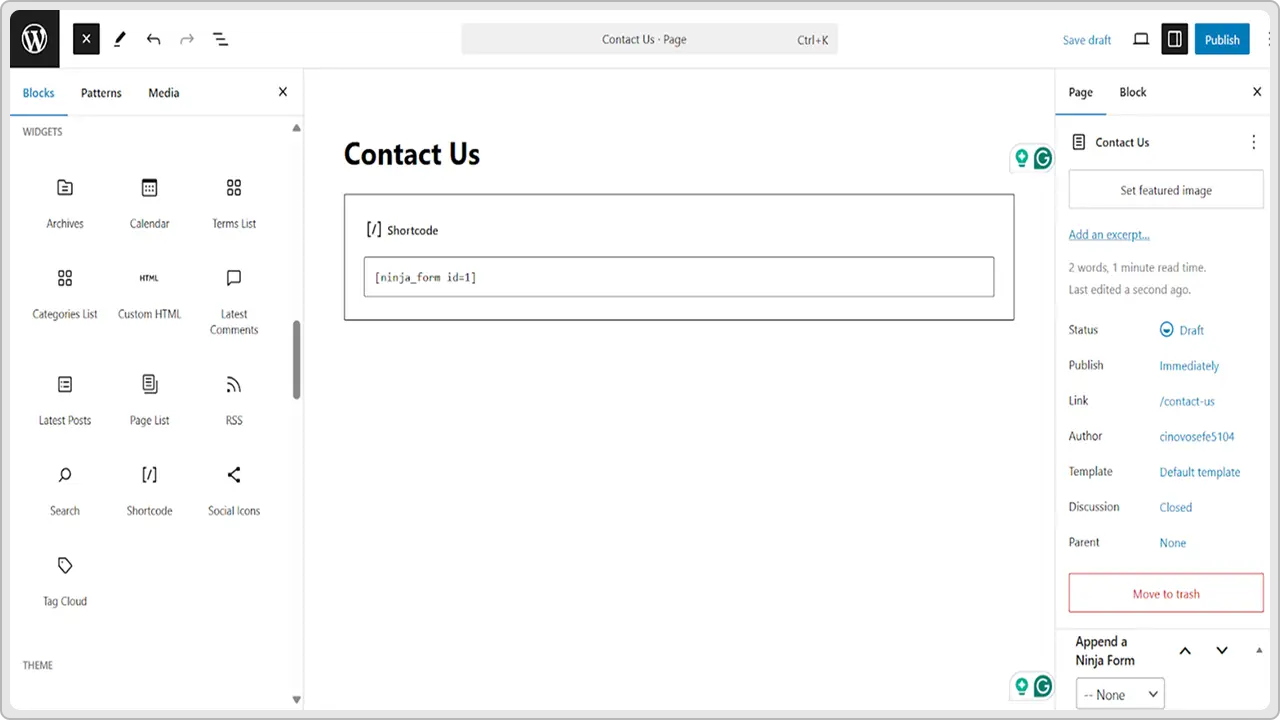
When you save your form, you’ll see a shortcode at the top of the Ninja Forms dashboard. This shortcode looks like [ninja_form id=”1″]. Just copy it.
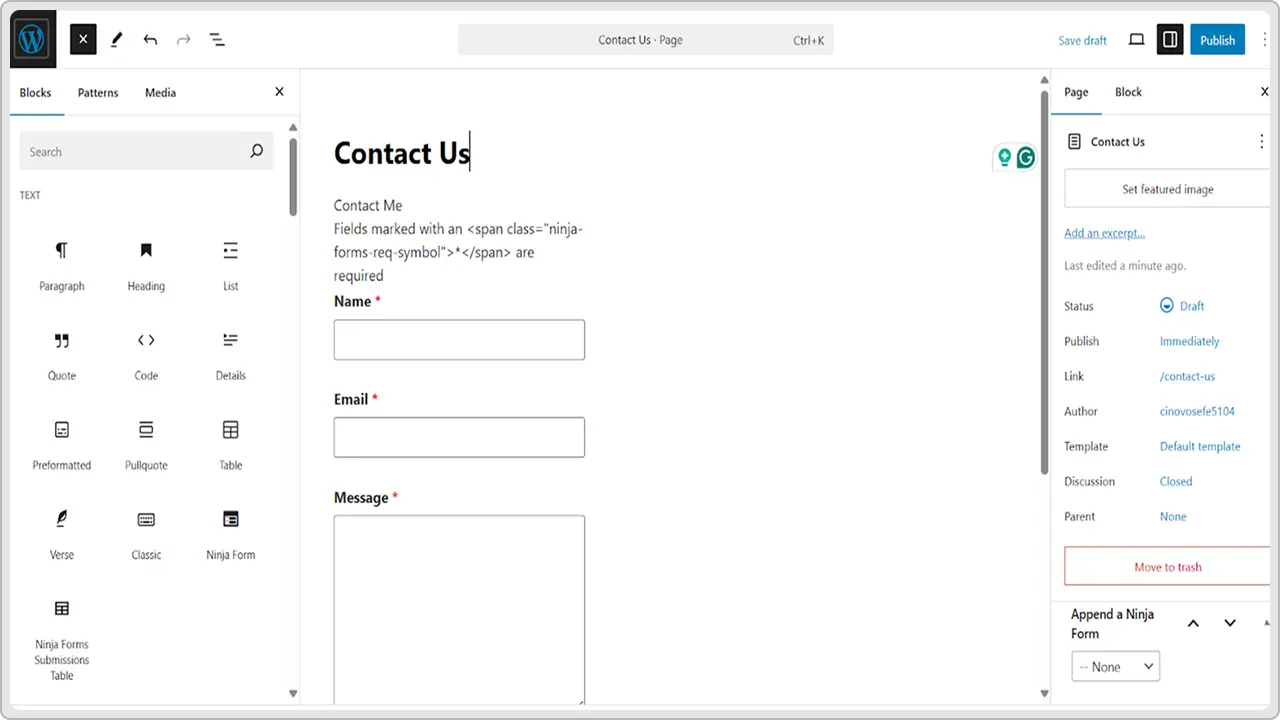
Next, go to the page or post where you want your form to appear. You can create a new page or edit an existing one. In the WordPress editor, click the plus icon to add a new block. Search for the Ninja Form block and select it, and you’ll see a dropdown list of your saved forms.
Pick the one you just made.
If you prefer, you can also paste the shortcode directly into your page or post. Either way works!
After you’ve added the form, click Save or Update, then preview your page to make sure the form appears correctly. Check that all fields look right and that the submit button is easy to find.
Your form is now live on your site, well, almost there.
Step 5: Test and Publish
Don’t be in a hurry to share your form with your website visitors; make sure to check all boxes.
Open the page or post where you added your form. Fill out the fields like the first name field, email field, or any custom fields you added, and click the submit button.
Check that you see the thank-you message or get sent to the new page you set up. Also, look in your inbox to make sure you got the email notification with the submitted data.
If something isn’t working, just go back to your Ninja Forms dashboard and edit the form.
Of course, you can adjust field settings in the right-hand sidebar, change your email action, or tweak any conditional logic if you’re using it.
Once you’re happy with how it works, click Save. Your form is now live on your WordPress site, and you’re ready to collect submissions from visitors.
Read More: WPForms vs. Contact Form 7
Conclusion
And that’s it! Now you know how to create a Ninja Form in WordPress, from installing the plugin to using the form builder, adding your fields, setting up email notifications, and placing your form on your site.
Ninja Forms makes it easy to build anything from a basic contact form to more advanced forms with conditional logic, file uploads, and custom fields, all without writing any code.
Remember, you can always go back to your Ninja Forms dashboard to edit, modify, or improve your forms as your needs grow.
If you run into any issues, the Ninja Forms support team and community are there to help. So, take a few minutes, test things out, and enjoy how simple it is to collect the data you need for your business.
From simple forms to full WordPress site development, cmsMinds is ready to help your business grow.

