As your ecommerce store continues to grow, your needs from a hosted platform grow as well. In such a case, most WordPress users face some constraints that make them feel limited, such as:
- Limited customization options
- Performance issues
- Less scalability
For many entrepreneurs, the transition from WordPress to Shopify seems natural. However, it can be a little daunting for those who are not equipped with a simplified process.
If that sounds like you, we have got you covered.
We have created a simplified guide that will help you ensure a smoother migration from WordPress to Shopify.
How to Migrate from WordPress to Shopify?
The basis of migration starts with deciding what stored data (i.e. customer information, order history, etc) to move as there are multiple sets of data on your WordPress site and they can’t all be moved the same way.
Once you’re clear on that, you will need a method. This will help you determine the most efficient method for moving your information from WordPress to Shopify. Also, having a well-defined plan is essential for a smooth and effective transition.
For smaller data sets, such as a limited number of products, a manual copy-and-paste approach might be feasible. However, as the volume of data increases, this method can become cumbersome and prone to errors.
Fortunately, there are alternative solutions available.
Third-party apps like Matrixify or Cart2Cart WooCommerce Import offer specialized tools to streamline the migration process. These applications can handle the transfer of various data types, including products, order history, customer information, gift cards, blog posts, and pages.
Another option is to export and import data using CSV files. While this method can be effective, it’s Exporting Products from WooCommerce important to note that some data may not transfer perfectly, potentially leading to inconsistencies or incomplete information.
To provide a comprehensive guide, we’ll cover three migration approaches:
- Transferring products
- Transferring the customers
- Transferring the orders
By exploring these different methods, you’ll be better equipped to choose the most suitable option based on your specific data requirements and preferences.
The following steps will guide you through the process of migrating your data from WordPress to Shopify, ensuring a seamless transition for your online business:
Step 1: Get the Product Information
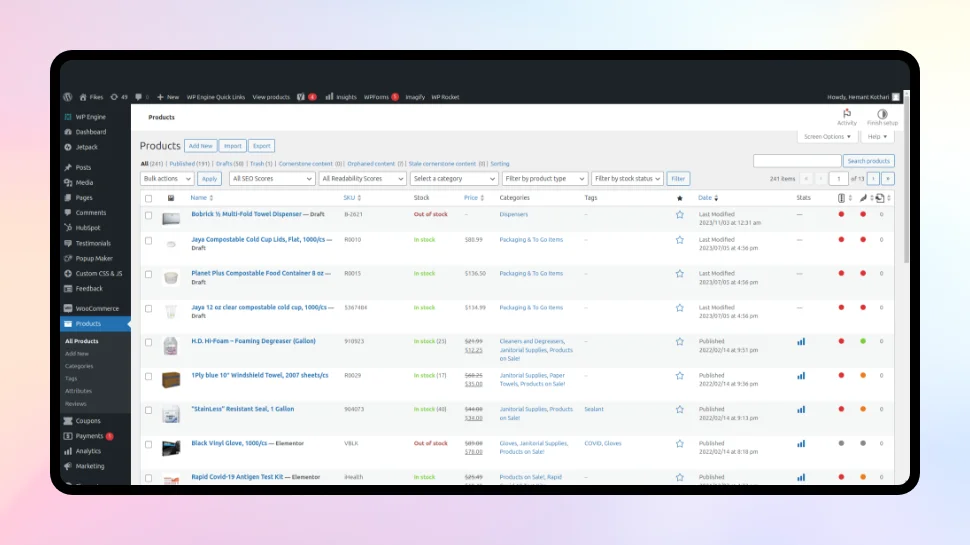
First things first, you need to get your product information out of WooCommerce. Here’s how:
- Log into your WooCommerce account and go to the main dashboard.
- Click on “Products” in the left-hand menu, then select “All Products.”
- At the top of the products list, you’ll see an “Export” button. Click on that.
A new screen will pop up, giving you options to choose which product details you want to export. Select the columns, products, and categories you need.
Once you’ve made your selections, hit “Export” at the bottom of the screen. This will generate a CSV file containing all your product data.
Step 2: Modify the CSV File for Shopify
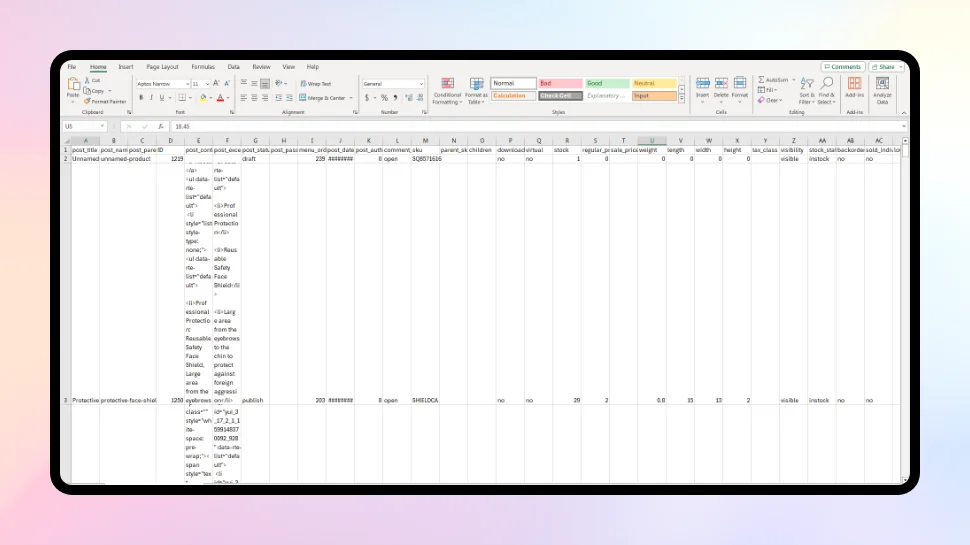
Shopify has its own way of organizing product information, so we need to tweak the CSV file a bit:
- Open up the CSV file you just exported from WooCommerce.
- Rename some of the column headers to match what Shopify expects. Here’s a handy guide:
- “Name” should be changed to “Title”
- “Description” should be changed to “Body (HTML)”
- “Attribute 1 name” should be changed to “Option1 Name”
- “Attribute 1 value(s)” should be changed to “Option1 Value”
- “Attribute 2 name” should be changed to “Option2 Name”
- “Attribute 2 value(s)” should be changed to “Option2 Value”
- “SKU” should be changed to “Variant SKU”
- “Weight (lbs)” should be changed to “Variant Grams”
- “Stock” should be changed to “Variant Inventory Qty”
- “Regular price” should be changed to “Variant Price”
- “Images” should be changed to “Image Src”
- Save the modified CSV file.
Step 3: Importing Products to Shopify
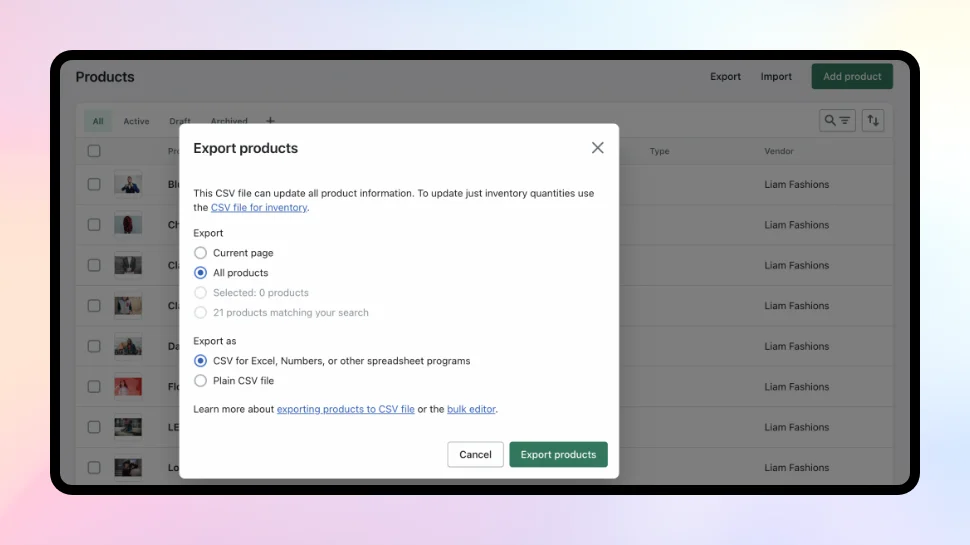
Now that your product data is in the right format, it’s time to import it into Shopify:
- Log into your Shopify admin panel.
- Click on “Products” in the left-hand menu.
- At the top of the products list, you’ll see an “Import” button. Click on that.
A new screen will appear, prompting you to upload a file. Select the modified CSV file you just saved and click “Upload file.”
Step 4: Check and Correct Product Data
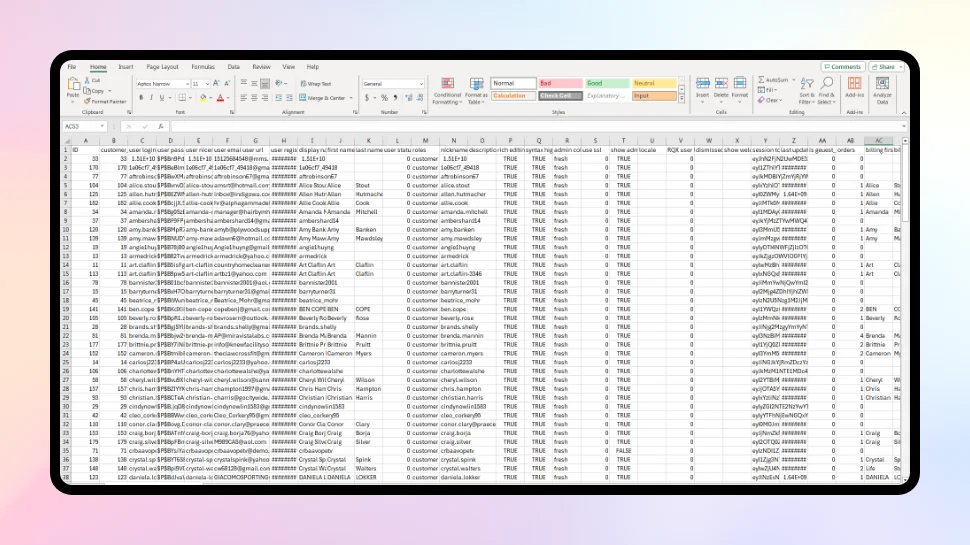
After the import is done, it’s a good idea to double-check that everything looks right:
- Go through your product list in Shopify and spot-check some of the imported products.
Make sure the details (titles, descriptions, variants, prices, etc.) all match up with what you had in WooCommerce.
If you notice any mistakes or missing information, you can edit the product details directly in Shopify.
Bringing Your Customers Along
When you move to a new online store, you’ll want to make sure all your existing customers can come with you. Here’s how to transfer them from WordPress to Shopify:
Step 1: Export Customer Data from WordPress
First thing first – we need to get all that customer info out of WordPress:
- Log into your WordPress dashboard and install a new plugin called “Import Export Suite for WooCommerce”.
- Once it’s activated, you’ll see a new menu item for the plugin. Click on that.
- In the plugin menu, look for an option to export your user or customer data and select it.
This will generate a CSV file containing all the details about your WordPress customers.
But we’re not quite done yet. Shopify organizes customer data a bit differently, so we need to modify that file:
- Open up the CSV file in a spreadsheet program like Excel or Google Sheets.
- You’ll see a bunch of column headers. We need to rename some of them to match what Shopify expects. Here’s a handy guide:
- “first_name” should be changed to “First Name”
- “last_name” should be changed to “Last Name”
- “user_email” should be changed to “Email”
- “billing_company” should be changed to “Default Address Company”
- “billing_address_1” should be changed to “Default Address Address1”
- “billing_address_2” should be changed to “Default Address Address2”
- “billing_city” should be changed to “Default Address City”
- “billing_state” should be changed to “Default Address Province Code”
- “billing_country” should be changed to “Default Address Country Code”
- “billing_postcode” should be changed to “Default Address Zip”
- “billing_phone” should be changed to “Phone”
Once you’ve renamed the headers, save the updated CSV file.
Step 2: Import Customers to Shopify
With that modified file ready to go, we can now import all those customers into your new Shopify store:
- Log into your Shopify admin area and click on “Customers” in the left menu.
- You’ll see an “Import customers” button at the top – click on that.
- A new screen will open, prompting you to upload a file. Select the CSV file you just saved and click “Upload file”.
Shopify will then import all the customer records from that file into your store’s customer database.
Step 3: Review and Make Adjustments
After the import finishes, it’s a good idea to spot-check some customer profiles to ensure everything is transferred accurately:
- In your Shopify admin, browse through a few random customer records.
- Make sure names, emails, addresses, and any other key details all match what you had in WordPress.
- If you notice any mistakes or missing info, you can edit that customer’s profile directly in Shopify.
Transferring Your Orders
Moving your products and customers is crucial, but you’ll also want to bring along your existing order history to Shopify. Here’s how:
Step 1: Export Order Data from WordPress
Remember that “Import Export Suite for WooCommerce” plugin we used earlier? We’re going to use it again for order exports:
- Go back into the plugin menu in your WordPress dashboard.
- Look for an option to export your order data and select it.
This will generate a new CSV file containing all the details of your past orders in WooCommerce.
Step 2: Import Orders to Shopify
Unlike products and customers, Shopify doesn’t have a built-in tool to import orders. But don’t worry, they’ve got some recommended third-party apps that can handle it:
- Head to the Shopify App Store and install an app like Matrixify or LitExtension Store Migration.
- These apps will walk you through uploading that order export file from WordPress.
- Follow the instructions to map your data to Shopify’s requirements.
Once set up, the app will transfer all your previous orders into your new Shopify store. Keep in mind that these apps aren’t free, but they can save you a ton of manual work.
Additional Shopify Setup
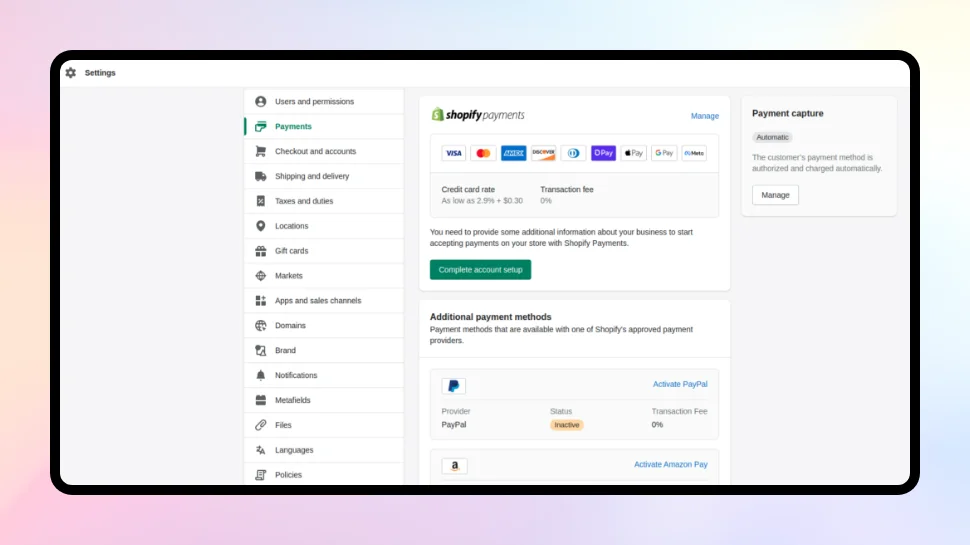
With your store data migrated over, there are just a few more things to configure in your new Shopify dashboard:
- Setting Up Taxes, Payments & Domain
- Click on “Settings” and then “Taxes” to configure tax rates for your location and needs.
- Next, go to “Settings” > “Payments” to activate your preferred payment gateways like PayPal, Apple Pay, etc.
- Finally, you’ll want to set up your domain by going to “Online Store” > “Domains.”
- Adding Themes
Of course, your store needs to look great too! Shopify makes this easy:

- Go to “Online Store” > “Themes” to browse the theme library.
- When you find one you like that fits your vibe, just click to install it on your site.
You can then customize the look and feel of your new theme as much as you want.
Conclusion
Migrating from WordPress to Shopify is a simple process. In short, you need to import your database backup.
Remember that you might encounter some issues while migrating from WordPress to Shopify For example, you might get an error. In most cases, the solution to migration problems is to upgrade both databases to their latest versions before trying again.
With cmsMinds’ WordPress migration services, you can get every piece of your valuable data securely moved to your desired platform. Ready to take your ecommerce business to new heights?


