Let’s create something better together.

If you prefer phones, we have one of those too: +1 978 455 4515


    [group group-text]


    [/group]
    [group group-email]


    [/group]
    [group PhoneNumber]


    [/group]


    • Project Info
      icon
    • Technology
      icon
    • Contact Details
      icon


      [group site_url]


      [/group]


      BackNext


      [group email]


      [/group]
      [group tel]


      [/group]
      [group slack]


      [/group]
      [group skype]


      [/group]

      Back

      Webflow to WordPress Migration Made Easy: A Comprehensive Guide

      Webflow to wordpress migration

      If you have been using Webflow and are craving for more flexibility, customization, and control, migrating to WordPress could be your best move. Imagine transforming your site into a powerful platform that showcases your brand and adapts to your evolving needs.

      This guide will break down the migration process from Webflow to WordPress into easy-to-follow steps. Whether you are a designer looking to expand your toolkit or a business owner wanting to enhance your online presence, we have got you covered.

      Webflow vs. WordPress

      What is Webflow?

      Webflow is a visual website builder that combines design and development into a single platform. Its key features include:

      • Webflow Designer: A no-code visual editor that allows users to create and customize websites easily.
      • Templates: Access to over 2,000 free and paid templates tailored for various needs.
      • CMS Capabilities: The Webflow CMS enables users to create custom content types for blogs, portfolios, and more.
      • Interactions and Animations: Tools for creating engaging animations and interactions without coding.
      • Hosting: Integrated hosting through Amazon Web Services (AWS), ensuring reliable performance.

      Pros:

      • Excellent design flexibility with a visual-first approach.
      • Built-in hosting and security, reducing maintenance overhead.
      • Clean code output for improved performance and SEO.

      Cons:

      • Limited plugin ecosystem compared to WordPress.
      • Higher costs for advanced features.
      • Can be complex for users without basic HTML/CSS knowledge.

      What is WordPress?

      WordPress, on the other hand, is an open-source content management system (CMS) that powers over 40% of websites globally. Its primary features include:

      • Intuitive Dashboard: A user-friendly interface for managing website settings and content.
      • Gutenberg Editor: A block-based editor that simplifies page and post creation without needing code.
      • Extensive Theme and Plugin Library: Access to over 11,000 themes and more than 60,000 plugins for added functionality.
      • Multi-user Management: Supports multiple user roles, allowing different access levels for team members.

      Pros:

      • Vast library of plugins and themes for extensive customization.
      • Strong community support with numerous resources available.
      • Highly flexible, suitable for various types of websites from blogs to eCommerce.

      Cons:

      • Requires regular maintenance, including updates and security checks.
      • Performance can be affected by poorly optimized themes or excessive plugins.
      • Advanced customization often requires coding knowledge.

      Why Migrate from Webflow to WordPress?

      Migrating from Webflow to WordPress can offer several advantages:

      1. Flexibility: WordPress provides greater flexibility in design and functionality, allowing users to create highly customized websites tailored to their specific needs.
      2. Plugins: The extensive plugin library in WordPress enables users to add various features easily, from SEO tools to eCommerce capabilities, enhancing the overall functionality of the site.
      3. SEO Capabilities: WordPress is often regarded as one of the best platforms for SEO due to its customizable permalink structures, robust SEO plugins like Yoast, and built-in features that support optimization efforts.
      4. Scalability: As businesses grow, WordPress can accommodate increased traffic and additional features without compromising performance or requiring a complete redesign.
      5. Community Support: With a large user base, WordPress offers extensive community support, tutorials, and resources that can be invaluable during migration and ongoing site management.
      Make the Switch Today

      Ready to transition from Webflow to WordPress? Unlock endless possibilities for customization and scalability.Contact us to learn how we can help!

      GET FREE CONSULTATION

      Preparing for Migration

      Assessing Your Current Website

      Before diving into the migration process, let’s first evaluate your current website on Webflow. This assessment will help you identify what content, design elements, and functionalities need to be migrated to WordPress.

      Evaluating Content, Design, and Functionality

      1. Content: Review all the text, images, videos, and other media on your Webflow site. Make a comprehensive list of all pages, blog posts, and any other content types you have.
      2. Design: Analyze your current design layout. Take note of specific styles, fonts, colors, and any custom interactions or animations that contribute to the user experience.
      3. Functionality: Identify any forms, e-commerce features, or integrations (like social media or email marketing tools) that are currently in use. Understanding these elements will help you find equivalent solutions in WordPress.

      Identifying What Needs to Be Migrated

      • Pages: List all the pages that need to be transferred, including the homepage, about page, contact page, and any service or product pages.
      • Images and Media: Make sure to download all images and media files used on your site. These will need to be uploaded to your new WordPress site.
      • Forms: If you have contact forms or other interactive elements, note how they are currently set up so you can recreate them in WordPress using plugins like Contact Form 7 or WPForms.

      Setting Up Your WordPress Environment

      Once you have assessed your current website and identified what needs to be migrated, it’s time to set up your WordPress environment.

      Choosing a Hosting Provider

      Selecting the right hosting provider is essential for a smooth WordPress experience. Consider the following factors:

      • Performance: Look for hosts that offer fast loading times and reliable uptime.
      • Support: Choose a provider with responsive customer support that can assist you with any issues.
      • Features: Check for features like one-click WordPress installations, staging environments, and security measures.

      Some popular hosting providers include Bluehost, SiteGround, and WP Engine.

      Installing WordPress

      After selecting a hosting provider, you can install WordPress. Most hosting services offer a one-click installation option:

      1. Log in to your hosting account.
      2. Navigate to the control panel.
      3. Find the WordPress installer tool.
      4. Follow the prompts to complete the installation process.

      If you are setting up a local development environment instead of a live site, tools like Local by Flywheel or MAMP can simplify this process significantly.

      Selecting a Theme That Matches Your Design Goals

      The theme you choose will shape the look and feel of your site, so it’s important to select one that aligns with your vision and goals.

      1. Research Themes: Browse through the WordPress theme repository or premium theme marketplaces like ThemeForest or Elegant Themes to find options that align with your design goals.
      2. Customization Options: Look for themes that offer customization features so you can replicate your Webflow design effectively.
      3. Responsive Design: Ensure the theme is mobile-friendly and responsive across different devices.
      4. Demo Preview: Utilize demo previews to see how the theme looks in action before making a decision.

      Exporting Content from Webflow

      Migrating your website from Webflow to WordPress involves exporting your content and assets effectively. This section provides step-by-step instructions on how to export your pages, content, and media files from Webflow.

      To export your website content from Webflow, follow these steps:

        Open Your Webflow Project:

        • Log in to your Webflow account and navigate to the project you want to export.

        Exporting Code:

        • Click on the Export Code icon located in the upper right corner of the Webflow Designer.
        • Select Prepare Zip to generate a downloadable zip file containing your site’s code.

        Download the Zip File:

        • Once the preparation is complete, download the zip file. This file will include: HTML files

        Exporting CMS Collections (if applicable):

        • For any CMS collections (like blog posts), navigate to the specific collection in the left sidebar.
        • Click on the Export button at the top of the page.
        • This will download a CSV file containing all items from that collection, including any custom fields you have added.

        Review Exported Files:

        • Open the downloaded zip file to ensure all necessary files are included for your migration.

      Exporting Assets

      To ensure all your media files are available for use in WordPress, follow these steps:

        Download Images and Media Files:

        • While exporting CMS collections will provide URLs for images, it’s recommended to download these files directly to avoid broken links later.
        • Access the images folder within the exported zip file to find all images used on your site.

        Manual Download (if needed):

        • If you prefer or need specific images not included in the export, you can manually download them by navigating to each image in the Webflow Designer and saving them to your computer.

        Backup Original Project:

        • Keep a backup of your original Webflow project as a precautionary measure. This ensures that if anything goes wrong during migration, you still have access to all original content and assets

      Importing Content into WordPress

      Once you have exported your content from Webflow, the next step is to import it into your new WordPress site. This section will guide you through using the WordPress Block Editor to create pages and posts, as well as uploading media files.

      Using the WordPress Block Editor

      The WordPress Block Editor (Gutenberg) allows you to create and format content easily. Here’s how to get started:

      How to Create Pages and Posts in WordPress

        Log in to Your WordPress Dashboard:

        • Navigate to yoursite.com/wp-admin and enter your credentials.

        Creating a New Post or Page:

        • For a new post, go to Posts > Add New.
        • For a new page, go to Pages > Add New.

        Using the Block Editor:

        • The Block Editor uses a block-based system for adding content. Click on the “+” icon to add different types of blocks (e.g., Paragraph, Image, Heading).
        • You can also drag and drop blocks to rearrange them as needed.

        Importing Text Content:

        • Copy the text content from your exported files or CSV and paste it into the appropriate blocks in the editor.
        • Use formatting options in the toolbar to style your text (e.g., bold, italics, lists).

        Formatting Tips:

        • Use headings (H1, H2, H3) for better structure and SEO.
        • Break up large blocks of text with images or other media for better readability.
        • Utilize lists and quotes where appropriate to enhance the presentation.

        Previewing Your Content:

        • Click on the Preview button to see how your post or page will look once published.

        Publishing Your Content:

        • Once satisfied with your content, click the Publish button to make it live on your site.

      Uploading Media Files

      To ensure that all images and other media files from Webflow are available in your WordPress site, follow these steps:

      Instructions for Uploading Images and Other Assets

        Access the Media Library:

        • In your WordPress dashboard, navigate to Media > Add New.

        Uploading Files:

        • You can either drag and drop files directly into the upload area or click on Select Files to browse your computer for images and other media files.
        • Select all relevant files you exported from Webflow (images, videos, etc.) and upload them.

        Organizing Media Files:

        • After uploading, you can edit each file by clicking on it in the Media Library.
        • Add titles, alt text, captions, and descriptions for better SEO and accessibility.

        Inserting Media into Posts/Pages:

        • While editing a post or page in the Block Editor, click on the “+” icon where you want to insert an image.
        • Select Image, then choose either to upload a new image or select one from the Media Library.

        Optimizing Images:

        • Ensure that images are optimized for web use (compressed for faster loading times).
        • Use descriptive filenames and alt text for SEO benefits.

      Recreating Design Elements

      Customizing Your WordPress Theme

      To replicate your Webflow design in WordPress, customizing your theme is essential. Here are some effective tips to help you achieve a similar look and feel:

      1. Choose the Right Theme:
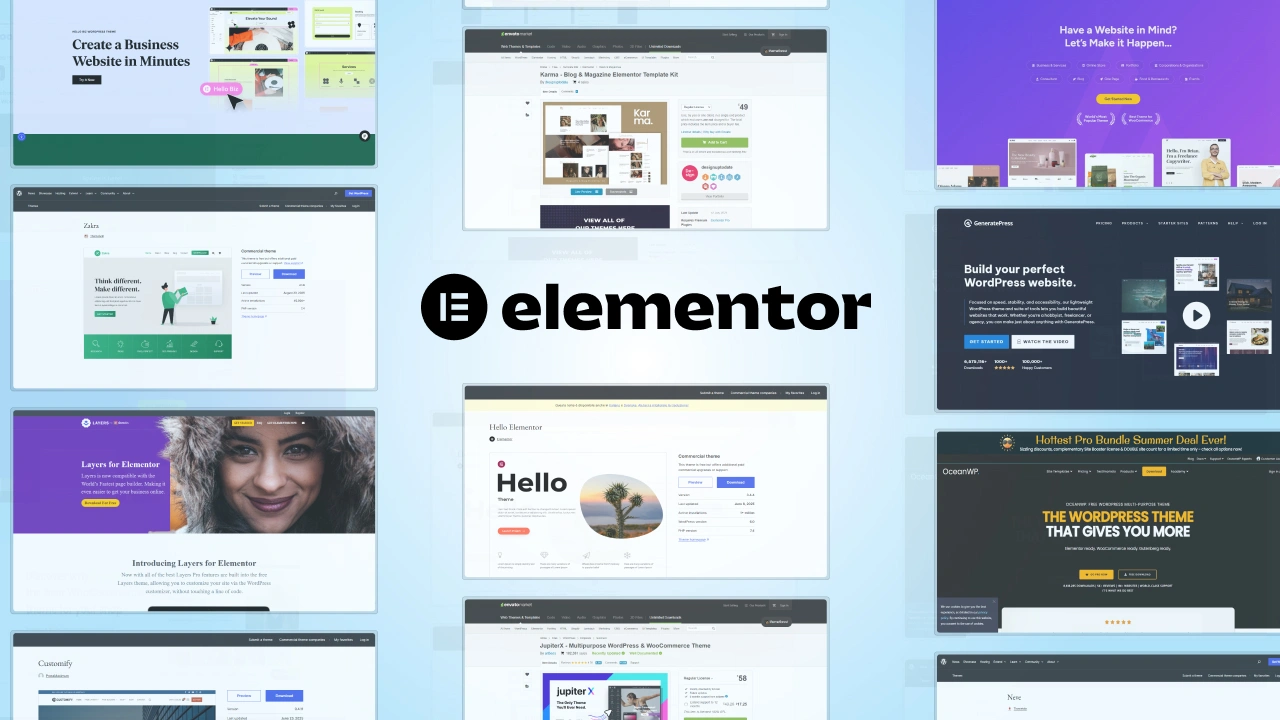
        Start with a theme that closely aligns with your desired design. Look for themes that offer flexibility and customization options, such as Astra or OceanWP, which are known for their adaptability.
      2. Use the WordPress Customizer:
        Access the Customizer by navigating to Appearance > Customize in your WordPress dashboard. This tool allows you to modify various aspects of your theme, including colors, fonts, and layouts, with real-time previews of your changes.
      3. Utilize the Full Site Editor (FSE):
        If your WordPress theme supports it, leverage the Full Site Editor for a more comprehensive approach to customization. This feature allows you to edit all parts of your site visually without needing to write code.
      4. Add Custom CSS:
        For specific styling adjustments that the Customizer might not cover, use the Additional CSS section in the Customizer to add custom styles. This is particularly useful for fine-tuning elements like spacing and alignment.
      5. Create a Child Theme:
        If you plan on making extensive changes, consider creating a child theme. This allows you to modify theme files without losing changes during updates.
      6. Test Responsiveness:
        Ensure that your customizations look good on all devices by testing responsiveness using tools within the Customizer or external services.

      Utilizing Plugins for Enhanced Functionality

      Plugins are crucial for enhancing the functionality of your WordPress site beyond what your theme offers. Here are some recommended plugins for various needs:

        Forms:

      • Contact Form 7: A versatile plugin for creating contact forms with customizable fields.
      • WPForms: Offers a drag-and-drop builder for creating forms easily, suitable for beginners.

      SEO:

      • Yoast SEO: Provides tools for optimizing your content and improving search engine visibility.
      • Rank Math: An alternative SEO plugin that offers advanced features and analytics.

      Performance:

      • WP Rocket: A caching plugin that improves site speed and performance through various optimization techniques.
      • Smush: Automatically optimizes images to enhance loading times without sacrificing quality.

      Design Enhancements:

      • Elementor: A powerful page builder that allows for extensive design customization through a visual interface.
      • Beaver Builder: Another popular page builder that provides flexibility in layout design without needing coding skills.

      Security and Backups:

      • Wordfence Security: Offers comprehensive security features to protect against malware and attacks.
      • UpdraftPlus: A reliable WordPress backup plugin that enables scheduled backups and restores with ease.

      Setting Up Essential Features

      SEO 

      To optimize your new WordPress site for search engines, follow these best practices:

      Conduct Keyword Research

      • Identify relevant keywords for your site and content.
      • Use keyword research tools like Google Keyword Planner or SEMrush to find high-volume, low-competition keywords.
      • Incorporate keywords naturally into your content, titles, meta descriptions, and URLs.

      Optimize Page Titles and Meta Descriptions

      • Write unique, compelling titles and meta descriptions for each page.
      • Include your target keyword in the title and description.
      • Keep titles under 60 characters and descriptions under 160 characters.

      Create an XML Sitemap

      • Generate an XML sitemap using a plugin like Yoast SEO or Google XML Sitemaps.
      • Submit your sitemap to Google Search Console to help search engines discover and crawl your pages.

      Optimize Images

      • Use descriptive file names and alt text for all images.
      • Compress images to reduce file size and improve page speed.
      • Consider using a plugin like Smush or Imagify for automated image optimization.

      Ensure Mobile Responsiveness

      • Make sure your WordPress theme is mobile-friendly and responsive across all devices.
      • Use Google’s Mobile-Friendly Test to check if your site is optimized for mobile.

      Improve Page Speed

      • Optimize your site’s performance using a caching plugin like WP Rocket.
      • Minimize HTTP requests, enable browser caching, and optimize images.
      • Use a content delivery network (CDN) like Cloudflare or Fastly to serve static assets faster.

      Setting Up Redirects

      Redirects are essential for maintaining your site’s SEO value when pages are moved or deleted. Here’s how to set up 301 redirects in WordPress:

        Install a Redirect Plugin

        • Use a plugin like Redirection or Safe Redirect Manager to manage redirects.
        • These plugins allow you to easily create and monitor redirects from the WordPress admin area.

        Create a 301 Redirect

        • In the plugin settings, add the old URL you want to redirect from.
        • Specify the new URL you want to redirect to.
        • Choose “301 Permanent” as the redirect type.

        Test the Redirect

        • Visit the old URL in your browser to ensure it redirects correctly to the new URL.
        • Check your site’s Google Search Console for any crawl errors related to the old URL.

        Monitor Redirects

        • Keep track of all redirects you’ve set up in the plugin’s logs.
        • Regularly check for any broken redirects or redirect chains that may negatively impact SEO.

      Testing Your New Site

      Before launching your new WordPress site, thorough testing is essential to ensure everything functions as intended. This section outlines a quality assurance checklist and tips for gathering user feedback.

      Quality Assurance Checklist

      Before launching your WordPress site, use this checklist to ensure everything functions correctly:

      1. Link Checking: Use tools like Broken Link Checker to identify and fix broken links.
      2. Visual Inspection: Review each page for design consistency and formatting issues.
      3. Functionality Testing: Test all forms, buttons, and interactive elements to ensure they work properly.
      4. Cross-Browser and Device Testing: Check your site in different browsers (Chrome, Firefox, Safari) and on various devices (desktop, tablet, smartphone) for responsiveness.
      5. Performance Testing: Use tools like Google PageSpeed Insights to assess loading times and optimize as needed.
      6. Security Testing: Verify that SSL is configured correctly and check for vulnerabilities using security plugins.

      Gathering Feedback

      To gather valuable user feedback before going live:

      1. Invite Beta Testers: Ask a small group of trusted users to navigate the site and share their experiences.
      2. Use Surveys: Create short surveys with tools like Google Forms to collect structured feedback.
      3. Encourage Open Communication: Provide a contact form for users to report issues or suggestions.
      4. Analyze Trends: Look for common themes in feedback to prioritize improvements.

      Final Preparations Before Launch

      Before going live, complete this checklist:

      1. Review Content: Ensure all pages and posts are proofread and formatted correctly.
      2. Check Links: Verify that all internal and external links work properly.
      3. Set Up SEO: Confirm that SEO settings are optimized, including titles and meta descriptions.
      4. Install Analytics: Set up Google Analytics or another tracking tool to monitor traffic.
      5. Backup Your Site: Create a backup of your site using a plugin like UpdraftPlus.

      Announcing Your New Site

      Promote your new site with these strategies:

      1. Social Media: Share announcements on your social media channels with engaging visuals.
      2. Email Newsletter: Send an email to your subscribers highlighting the new features and content.
      3. Blog Post: Write a launch blog post detailing your site’s purpose and what visitors can expect.
      4. Collaborate: Partner with influencers or other businesses to reach a wider audience.

      Post-Migration Considerations

      Ongoing Maintenance Tips

      To keep your WordPress site running smoothly:

      1. Regular Updates: Update WordPress core, themes, and plugins regularly to ensure security and performance.
      2. Backups: Schedule regular backups using plugins like UpdraftPlus or BackupBuddy.
      3. Security Measures: Install security plugins like Wordfence to monitor for vulnerabilities and threats.

      Exploring Advanced Features

      Enhance your site with these WordPress tools:

      1. Page Builders: Use plugins like Elementor or Beaver Builder for advanced layout customization.
      2. SEO Plugins: Optimize your content with tools like Yoast SEO or Rank Math.
      3. E-commerce Solutions: Consider WooCommerce if you plan to sell products or services online.

      Conclusion

      Remember, WordPress is a powerful cms platform with an extensive ecosystem of themes, plugins, and tools. As you continue to explore its capabilities, don’t hesitate to experiment and push the boundaries of what your website can achieve. Whether you’re looking to enhance your site’s SEO, add e-commerce functionality, or create a more engaging user experience, WordPress has the resources and community support to help you succeed.

      Start Your Migration Journey Today!

      Don’t let the complexities of moving from Webflow to WordPress hold you back. Dive into our comprehensive guide and take the first step toward a more powerful website!

      GET FREE CONSULTATION

      FAQs

      Yes, you can combine Webflow and WordPress. There are several methods to integrate the two platforms, such as using plugins that allow WordPress to pull in Webflow-designed pages or using Webflow as a headless CMS while managing content in WordPress.

      Whether WordPress is better than Webflow depends on your specific needs. WordPress offers more flexibility, a vast plugin ecosystem, and is widely used, making it suitable for complex sites. In contrast, Webflow excels in design control and ease of use for building visually appealing websites without coding.

      No, the design elements from Webflow will not automatically transfer to WordPress. You will need to recreate your site’s design using WordPress themes and possibly custom CSS to achieve a similar look and feel.

      After migration, it’s crucial to test your new WordPress site thoroughly. Check for broken links, verify that all content is correctly displayed, and ensure that functionalities like forms or e-commerce features are operational. Additionally, consider optimizing your site for SEO and performance improvements.

      Author's Bio

      Ujjawal Laddha is a Business Growth Strategist at cmsMinds, where he excels in aligning technology solutions with business needs. With a knack for compelling storytelling and user-centric design, Ujjawal takes technical precision up a notch. He aims to educate on CMS platforms like WordPress, Drupal & Shopify, to help you take informed decisions for web development success.

      Share This Article:

      Recent Blogs